Excel is a vital and widely adopted tool for businesses due to its simplicity and versatility. It simplifies data analysis, streamline processes, and aids informed decision-making, making it a cornerstone of corporate efficiency. In Business Central.
You will learn 5 Tips to Export Data from Business Central to Microsoft Excel.
- Open/Edit in Excel
- Copy/ Paste Rows
- OData Feed
- Configuration Packages
- Excel Report
Open/Edit in Excel
First and the Faster ways to export data to Excel from Business Central to use this addon. This built-in tool is present on every list page. You will see the symbol in the top right corner.
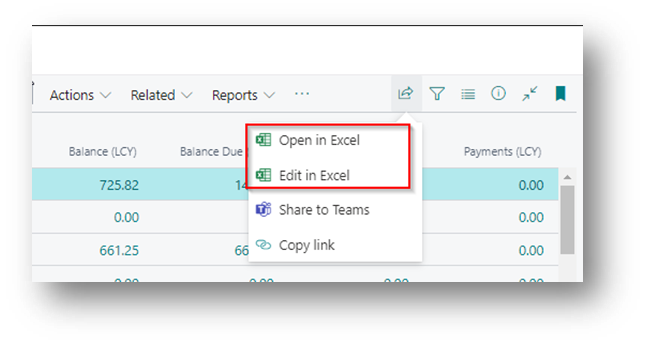
After that you have 2 options.
- Open in Excel
- Edit in Excel
Open in Excel:
In this Feature the file will be downloaded in the System and will not going to connect with the add-on which we will see in the Next Option. This only allows to see the data and make some changes on the Excel for testing or some other purpose like this but will not going to allow you to post in Back to the Business Central. That Means that edit option is just for your own checking purpose.
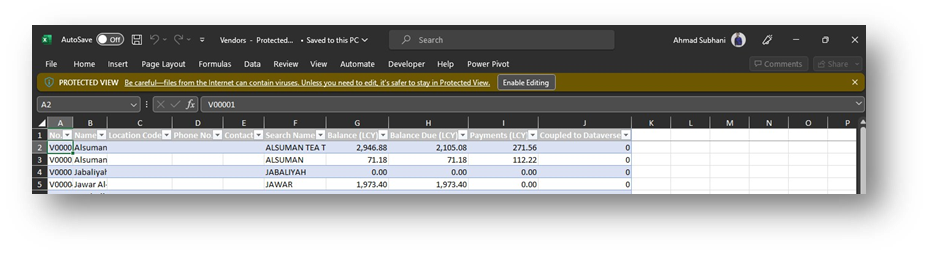
Edit In Excel:
In this feature a file will be downloaded in your system and allow you to edit the file and all the changes you made in the Excel can be uploaded to the Business Central Again. But there is a risk involved in this. If you are a Functional Consultant, then it is better for you to use (In Some Cases) but do not recommend it to the Clients.
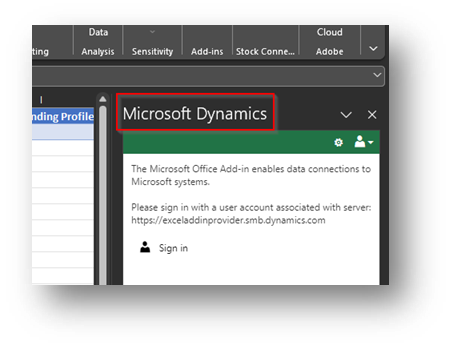
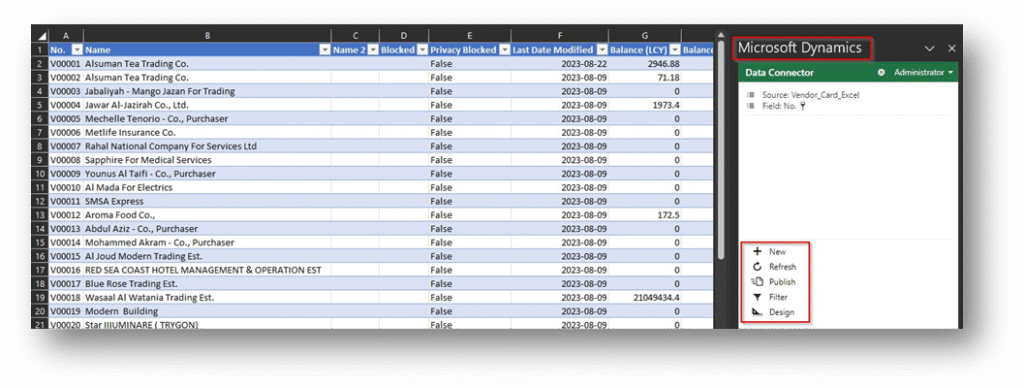
When logged in, the sheet will auto-load data, and on the right pane, you’ll find these options.
Any edits made on this sheet, followed by clicking ‘Publish,’ will synchronize all changes with Business Central. This includes insertions, deletions, and data modifications.
Additionally, refreshing the file will update this sheet with any alterations made in Business Central.
Copy/Paste Rows:
We can directly Copy and Paste the data from the Business central to Microsoft Excel.
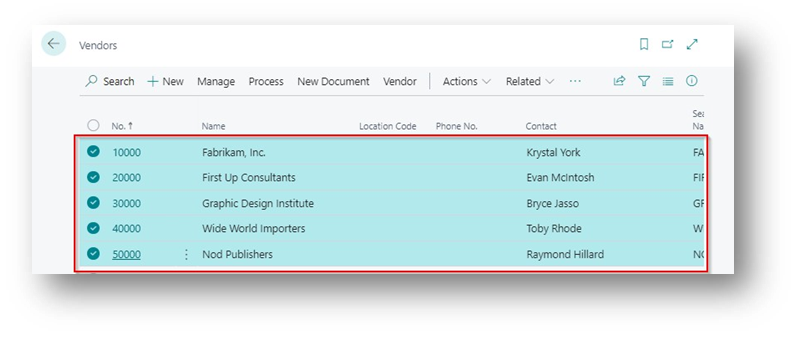
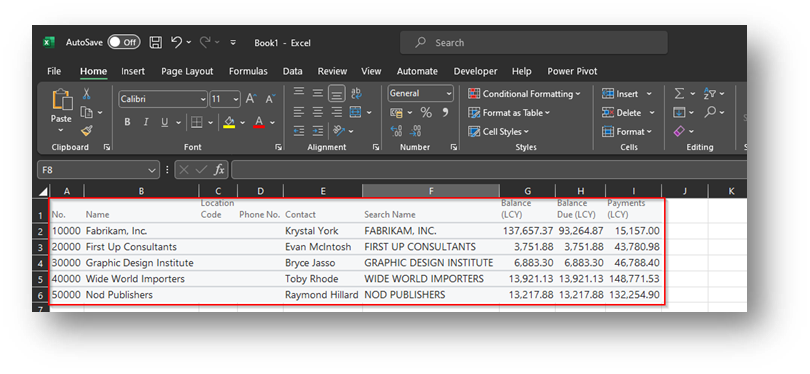
Select the lines and use ‘Ctrl + C’, you will see a small pop-up like “5 rows copied”. After that go to Excel and Then use, ‘Ctrl + V’ on your Excel sheet. This is what it will look like.
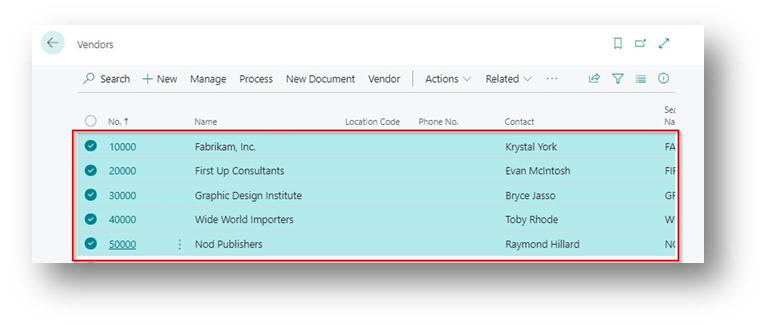
You can Copy the lines from the Excel to the Business Central in a same way. Select the lines and use ‘Ctrl + C and after that go to the Business Central and then use, ‘Ctrl + V’ for paste. This is what it will look like.
OData Feed:
In this method we will do the data retrieval and updates:
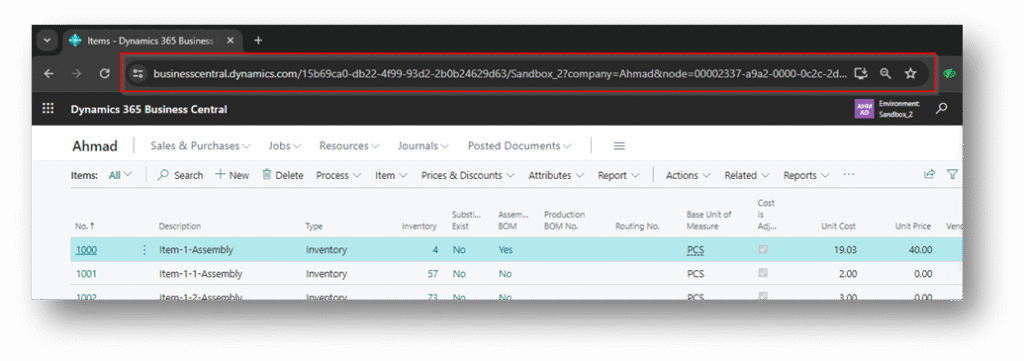
Copy the URL and then go to the Excel and click on the OData Feed.
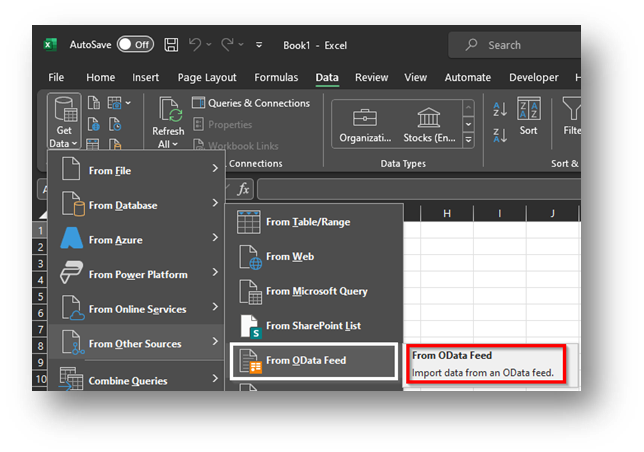
Data > Get Data > From Other Sources > From OData Feed.
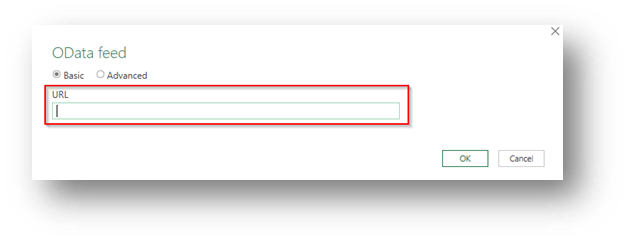
Click on that and paste the URL which you copied earlier.
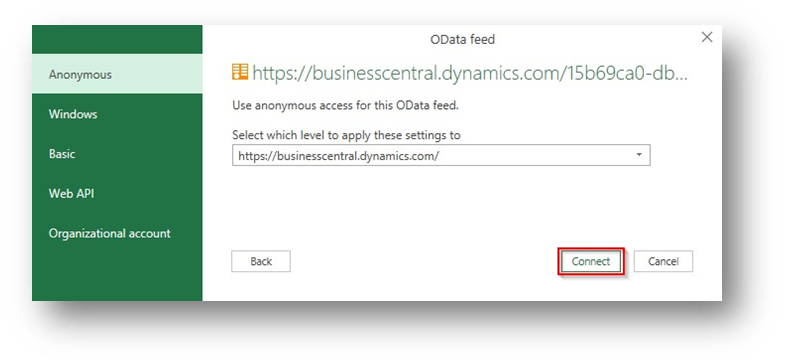
Click on Connect.
After that a Queries & Connection will develop between Business Central & Excel.
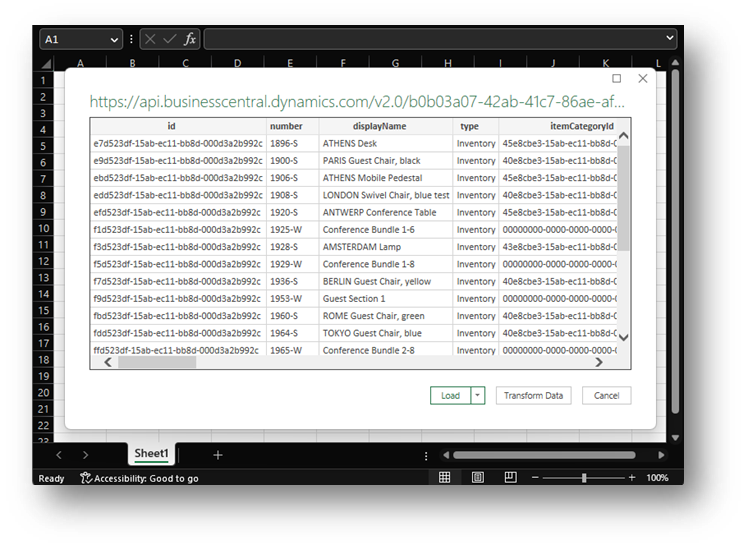
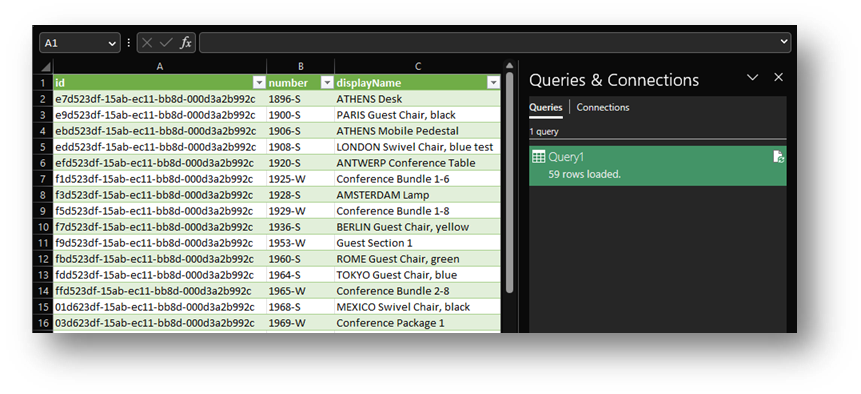
Click on Load and that data will then be exported to the Excel.
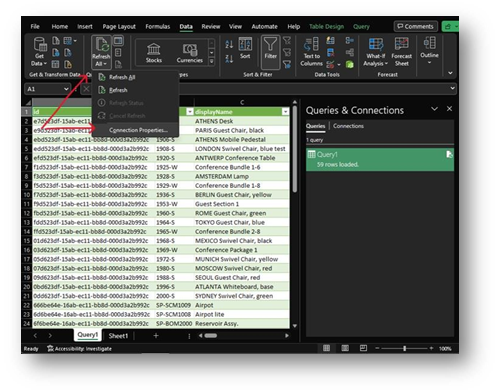
Upon loading, the sheet organizes data with a query on the right side, offering a user-friendly interface. To enable automatic refreshes, navigate to ‘Refresh All’ and ‘Connection Properties.’
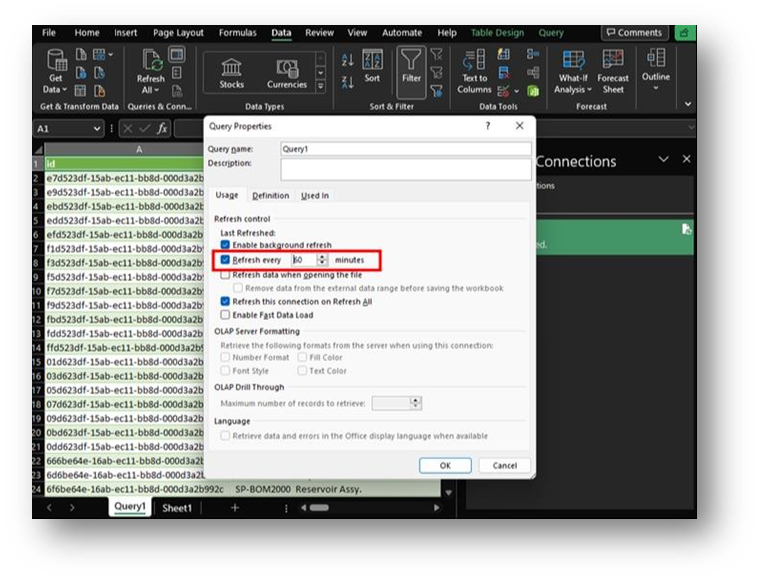
Configure the ‘Refresh every X minute’ field for periodic updates; note that the sheet must remain open for automatic refreshes to function.
This integration streamlines data retrieval and updates, enhancing efficiency in managing information from Business Central within Excel.
Configuration Packages:
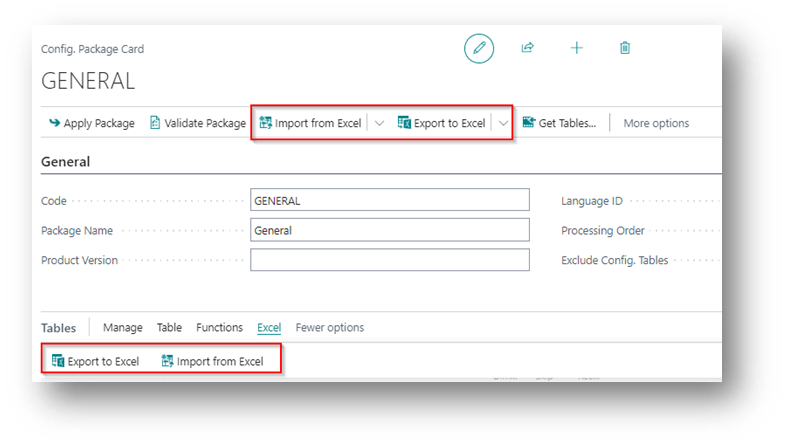
The ‘Configuration Packages’ tool in Microsoft Dynamics 365 Business Central is a popular choice for effortless data export and import. Through the ‘Export to Excel’ and ‘Import from Excel’ actions, users can seamlessly interact with data in Excel, offering a concise and efficient solution for data management within the platform.
Excel Report
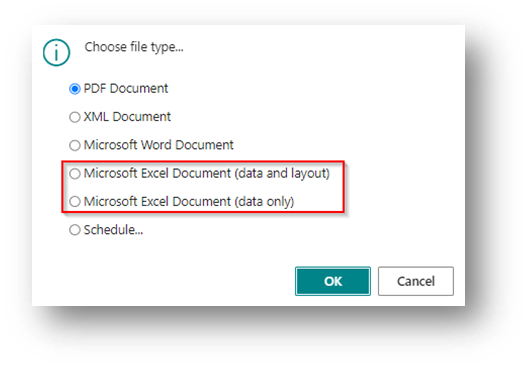
Navigate to the report from which you want to export information. For this example, let’s use the “Sales Statistics” report. Locate and click on the Send to. This action will open a menu of layout options.
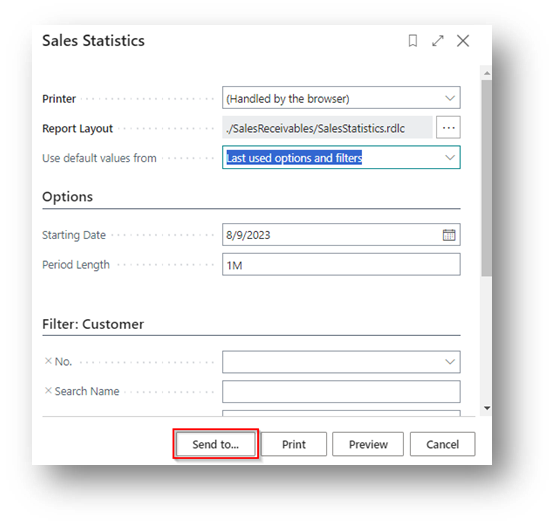
From the menu, there will be two options regarding the Excel:
- Excel Data & Layout
- Excel Data Only