
Modifying Card Page Names used because sometimes a page’s default title does not match how a client refers to it. The Item Card, for example, opens with the title “Item Card”, but a client may prefer to see “Product Card” instead, also the list page. This is a caption change, not a data change, and Business Central makes it straightforward through a page extension.
Identify the Page
Before writing any code, confirm exactly which page you are working with. Business Central’s built-in Page Inspection tool (Alt+Ctrl+F1, or the info icon in the top right) shows this without opening Visual Studio Code.
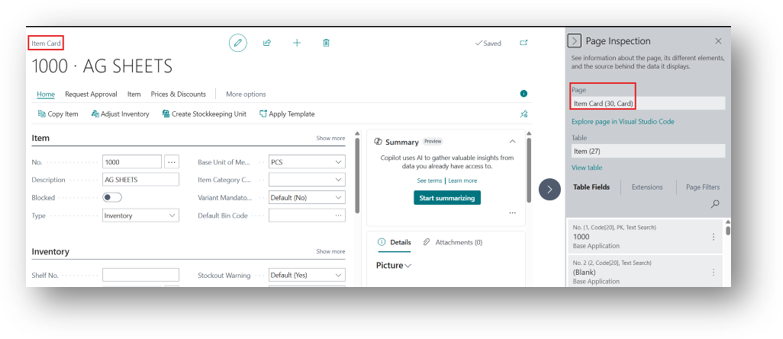
So now we will change the Captions from:
- Item Card -> Product Card
Create a Page Extension
Open AL in Visual Studio Code and create a page extension for the Item Card. Unlike a field caption, the page title is set directly on the pageextension object, so modify() is not needed here.
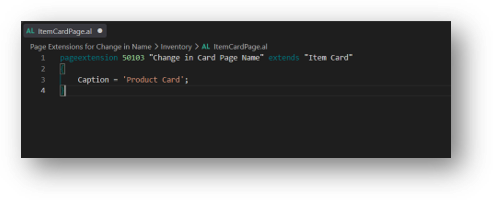
| pageextension 50102 “Change in Page Title” extends “Item Card” { Caption = ‘Product Card’; } |
The Caption property is the only property changed here. The page number, object name, and all underlying data remain exactly as before.
Build and Deploy
- Build the Extension (CTRL + SHIFT + B) and deploy it to your Sandbox Environment (F5 or Ctrl+F5 in VS Code).
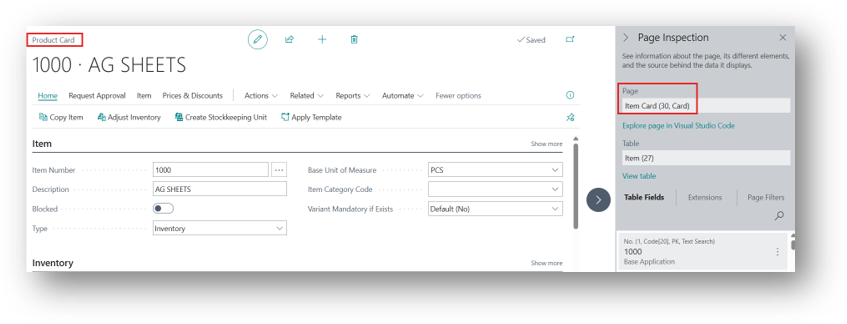
- Open the Item Card and confirm the title now reads “Product Card” instead of “Item Card”.
Keep in Mind
- A page Caption change affects only that page. If the same object is opened from a list page or a different extension, apply the change there too if consistency is required.
- Multi-language setups can use CaptionML instead of Caption to provide translated titles per language.
- Renaming a page title does not rename the page object, ID, or API, so downstream systems and integrations are unaffected.
Hope so this is Helpful😃