

This article explains what the Currency Exchange Rate Service is, and& walks you through how to set it up & use it step by step.
Introduction
In today’s global business environment, companies frequently deal with multiple currencies buying from international suppliers, selling to overseas customers, or managing bank accounts in foreign denominations. D365BC provides a powerful Currency Exchange Rate Service that automates the process of updating exchange rates, ensuring your financial data is always accurate and up to date.
What Is the Currency Exchange Rate Service?
The Currency Exchange Rate Service in Business Central is a built-in feature that automatically fetches and updates foreign currency exchange rates from an external data provider. Instead of manually entering rates every day, the service pulls the latest rates on a schedule you define — daily, weekly, or at any interval that suits your business.
Prerequisites
Before setting up the service, make sure you have:
- System Administrator or Super user permissions in Business Central
- At least one Foreign Currency already set up (e.g., USD, EUR, GBP)
Exchange Rate Platform
There are some free exchanges rates are available, and we can connect that with Business Central. And for this article we are going to use that one of the Exchange Rates.
Float Rates – https://www.floatrates.com
Step-by-Step Setup Guide
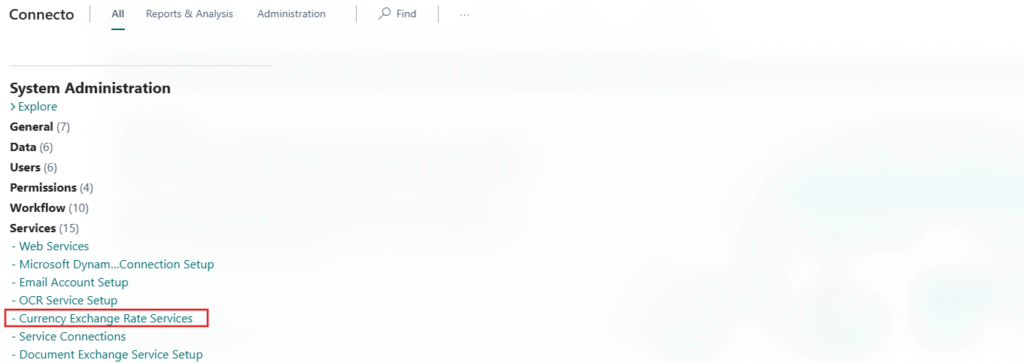
Step 1 —Currency Exchange Rate Services Page
- In Business Central, click the Search icon (magnifying glass) in the top right.
- Type “Currency Exchange Rate Services” and select the result.
- The Currency Exchange Rate Services list page will open.
You can also Navigate Via: System Administration → Service → Currency Exchange Rate Services
Step 2 — Create or Enable a Service
On the Currency Exchange Rate Services page, there could be 2 Scenario’s.
- To Enable an Existing service
- Click on the service name (e.g., ECB) to open the card.
- Toggle the Enabled field to Yes.
- Click OK or close the card. The service is now active.
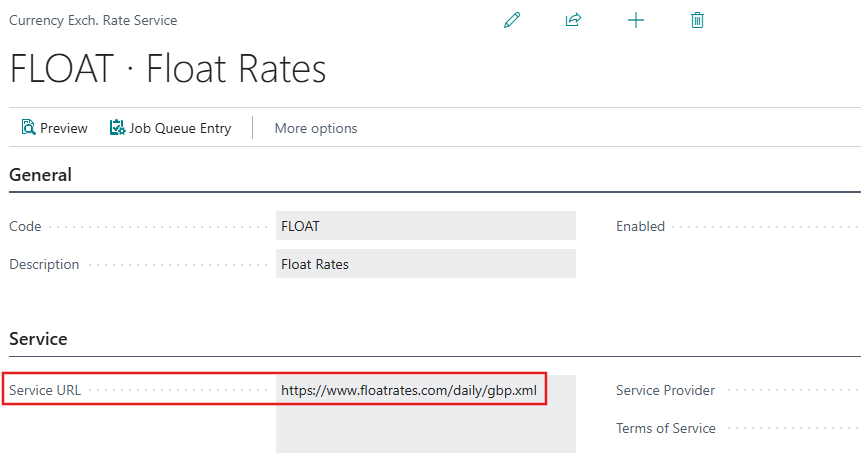
- To Create a New Service
- Code – Specifies the setup of a service to update currency exchange rates.
- Description – Specifies the setup of a service to update currency exchange rates.
- Enabled – Specifies if the currency exchange rate service is enabled.
- Service URL – Enter the URL from which you want to pick the Exchange Rates.
- Business Central natively supports XML format for exchange rate feeds.
- For JSON feeds, a custom Data Exchange Definition or middleware is required to convert the response before Business Central can process it.
- You can use the link as showed in the Screenshot. [https://www.floatrates.com/daily/sar.xml]
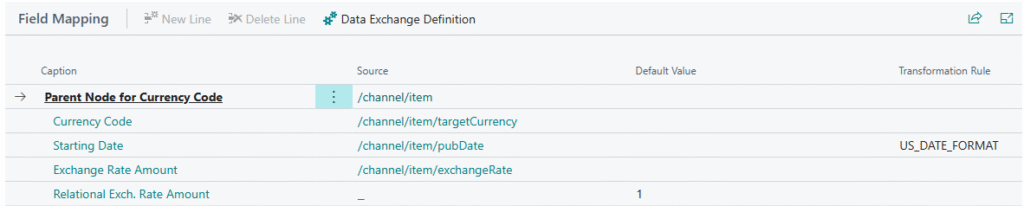
Step 3 — Field Mapping
This is the most technical part of the setup. Business Central needs to know where to find the currency code and exchange rate within the XML response from the provider.

Step 4 — Preview
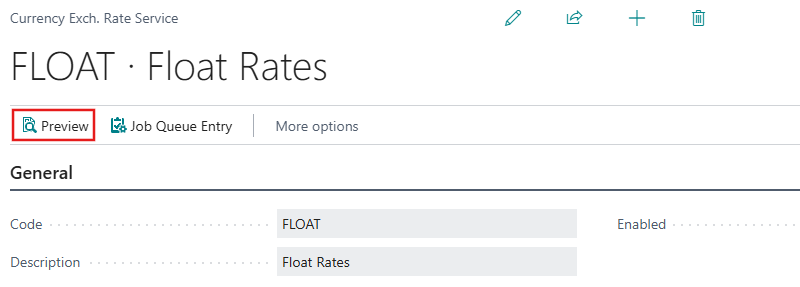
Once all your Mapping is done then Click on Preview to see the Exchanges Rates are Coming.
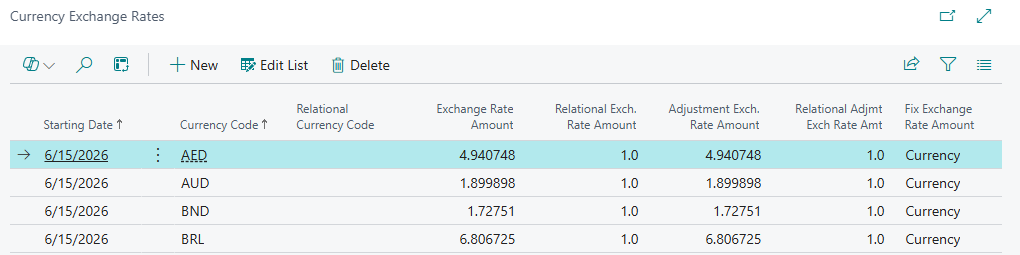
If coming, then we can Enable the Services.
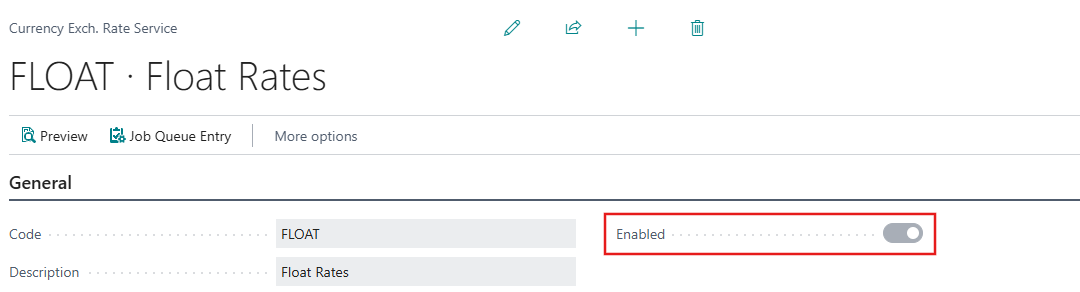
Once it is Enabled then it will Automatically create the Job Queue.
Step 5 — Exchange Rate in Currencies Table
Exchange Rate is updated as per the Float Rates.
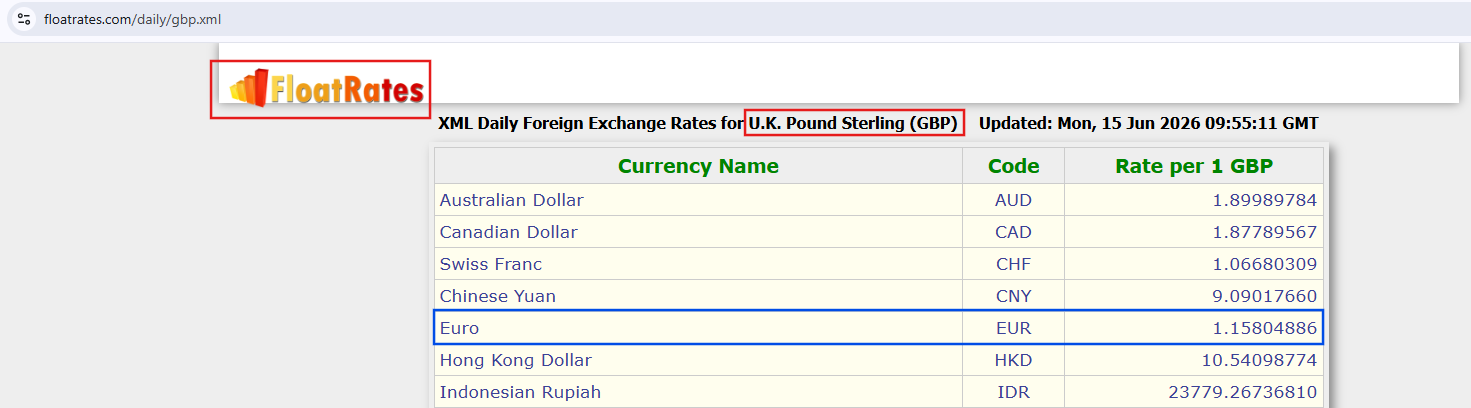
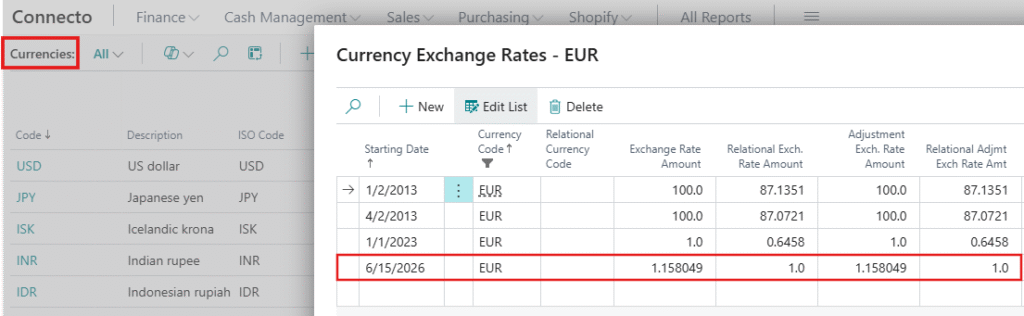
Remember that it will only going to update the Exchange Rate. If you think so it will create all the Currencies with Exchange Rate, then this is not the case.
Step 6 — What if we Change Exchange Rate in D365BC
I will Change the value from 1.158049 to 1.2
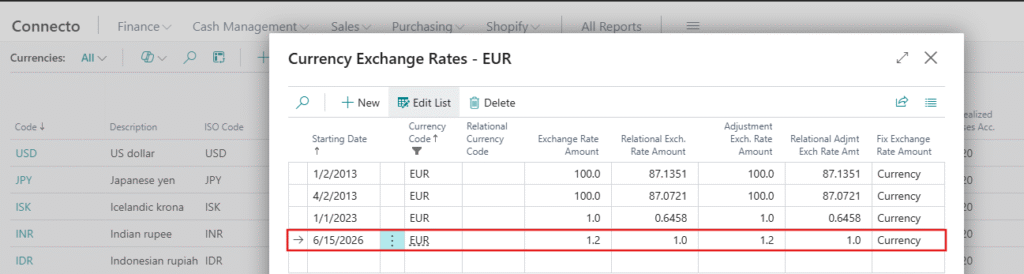
Now I have scheduled a Job Queue, and it will update the Exchange Rates based on the Float Rates website.
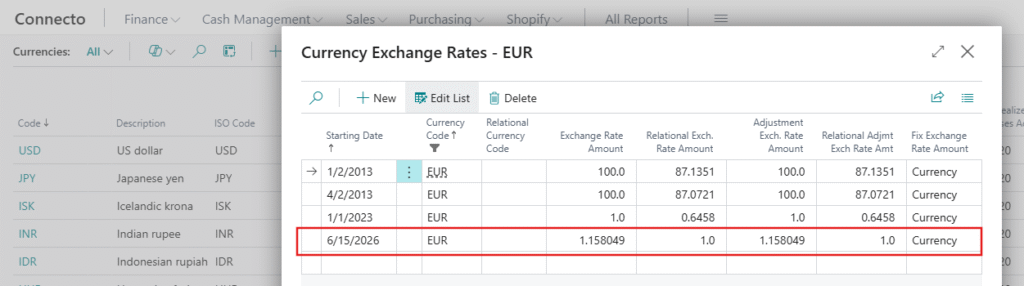
Step 7 — Set the Update Frequency (Job Queue)
To Updates rates there are 2 Methods.
Manual
- You need to select Update Exchange Rates on Currencies table.
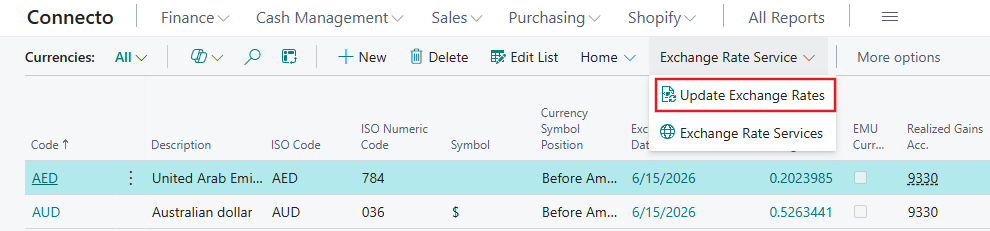
- Or you can use the “Run Once (Foreground)” on Job Queue Entry Card.
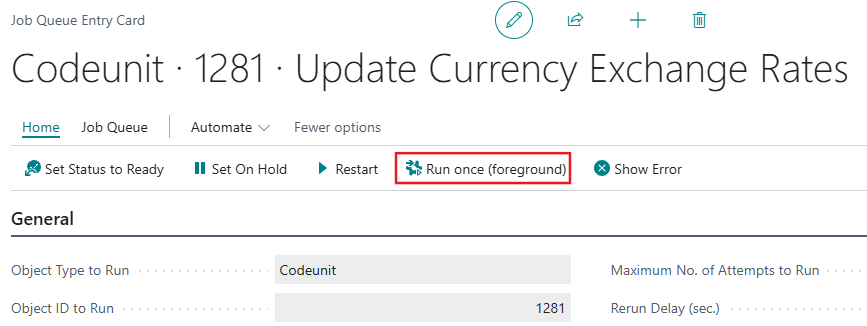
Automatic
First, that job queue created automatically but for “xyz” reason it was not working properly, so I just copied that 100% and it starts working. So, if job queue is not working at your end, then you can copy paste your Job queue.
- To schedule automatic updates, search for Job Queue Entries in the search bar.
- Click New to create a new job queue entry.
- Fill in the fields:
- Object Type to Run – Specify Codeunit.
- Object ID to Run – 1281 “Update Currency Exchange Rates” is the object id for this process.
- Description – Description for this Job Queue.
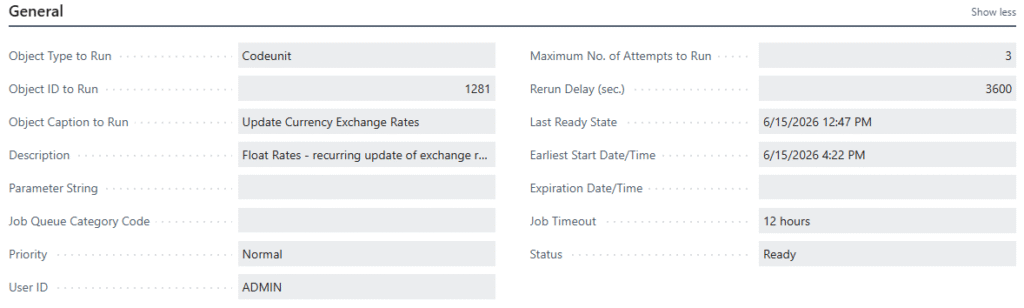
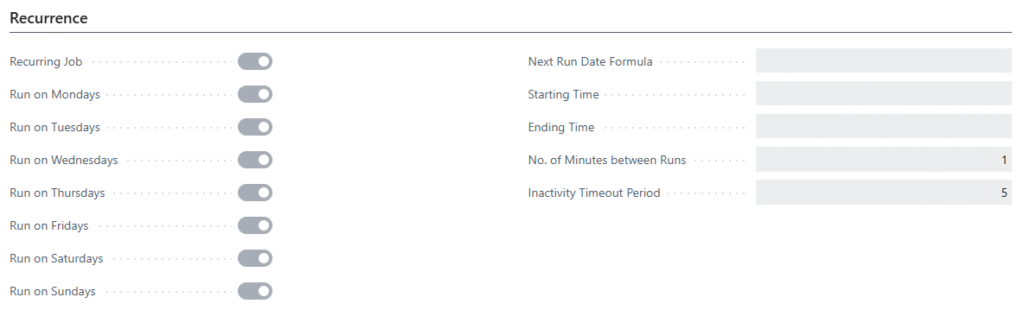
- Run on Monday to Sunday – You can enable the boolean for which day you want to run the job queue.
- Starting Time – Specifies the earliest time of the day that the recurring job queue entry is to be run.
- No. Of Minutes between Runs – Specifies the minimum number of minutes that are to elapse between runs of a job queue entry. The value cannot be less than one minute. This field only has meaning if the job queue entry is set to be a recurring job. (Leave blank if running once per day).
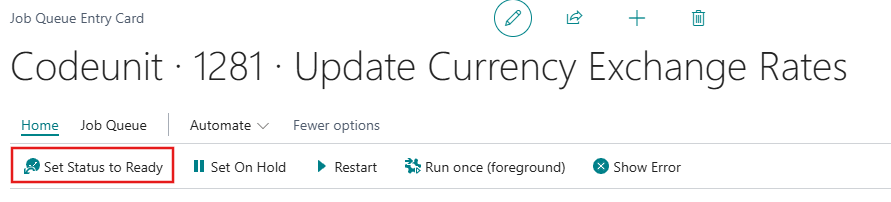
- Click on “Set Status to Ready”.
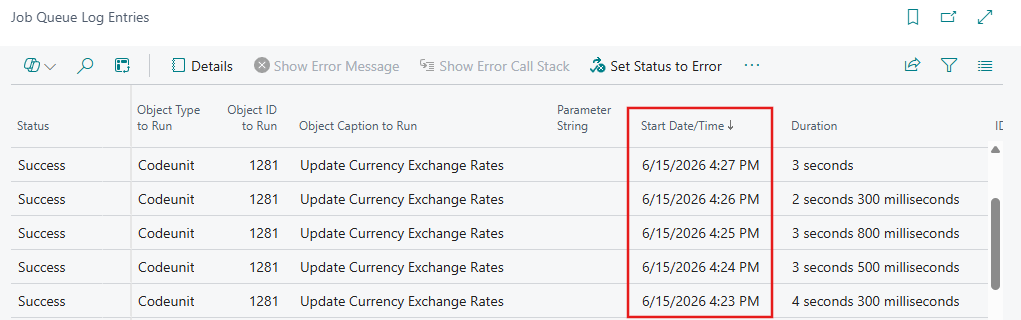
- Because I have specified 1 Min in “No. Of Minutes between Runs” that is why it is updating the Exchange rate after 1 minute and creating a Job Queue entry.
Business Central Online (SaaS) handles the job queue scheduler automatically. On-premises, ensure the NAS (NAV Application Server) or Job Queue service is running.