What is Quality Management?
Quality Management is a module that helps ensure products meet defined quality standards before they move further in the Supply Chain.
- Receiving
- Production
- Assembly
- Warehouse
It was introduced in Business Central 2026 Release Wave 1 (BC28). The extension comes preinstalled in all new BC environments. For existing environments, it can be installed from the Extension Management page. Furthermore, it is available for all localization.
Why It Matters
Without quality checks, defective goods can be received from vendors, processed in production, and shipped to customers before anyone notices a problem. Quality Management adds formal inspection checkpoints at critical stages, so issues are caught early, compliance is maintained, and customer confidence is protected.
Profiles (Roles)
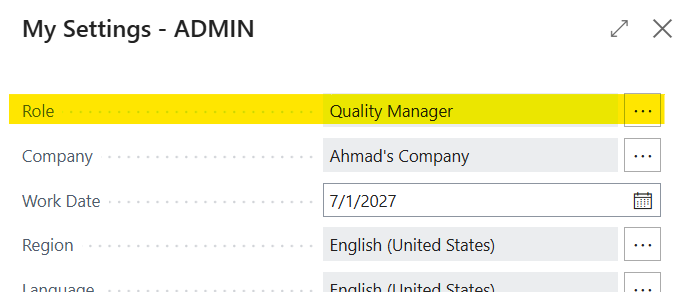
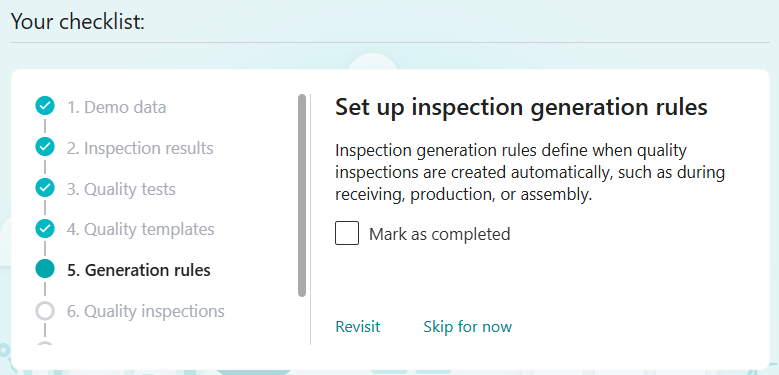
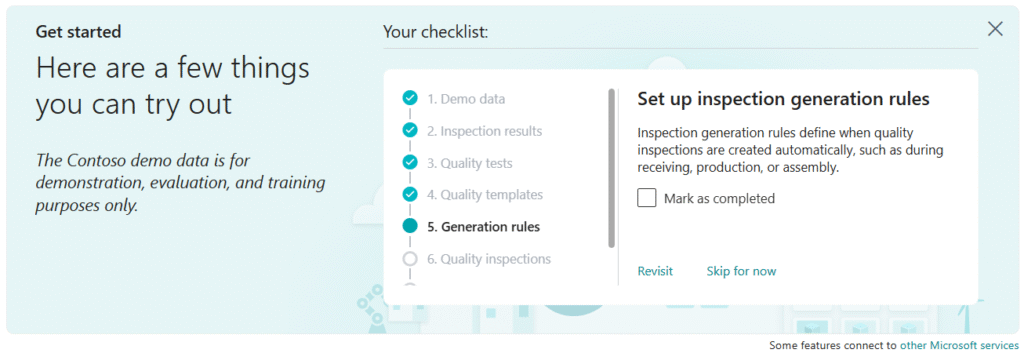
Business Central provides a dedicated Quality Manager profile. After switching to this role, a “Get Started” checklist appears on the home page, guiding you through each setup step in sequence.
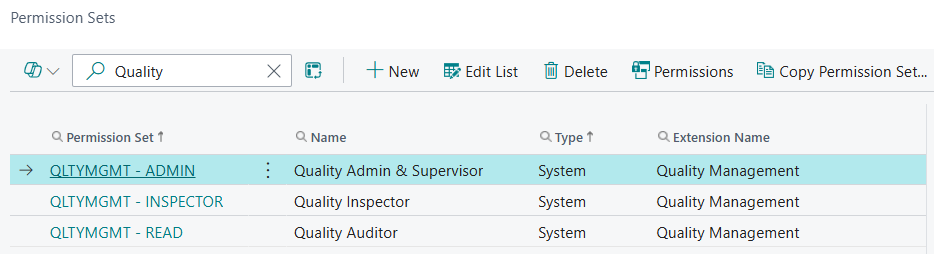
Permission Sets
Microsoft has Introduced 3 New Permission Sets for Quality Inspection Department.
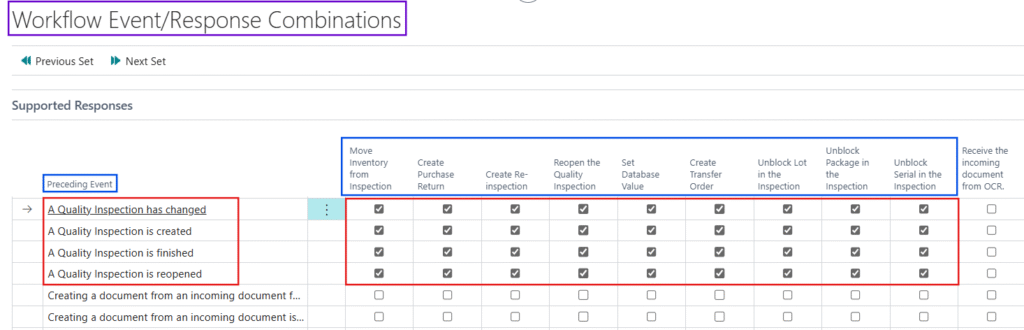
Workflow Events/ Responses
They have introduced the Workflow Responses to manage workflow Requirements but no new template is offered by Microsoft for this.
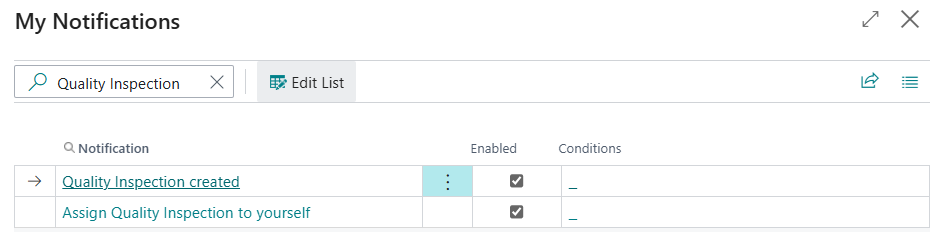
Notifications
Each user can configure personal Quality Management notifications in My Notifications. They can receive alerts when a new quality inspection is created and can choose to be notified with the option to assign the inspection to themselves. These notification settings are personal and do not affect other users.
Key Concepts
Before diving into setup, it helps to understand the Four Building Blocks of the Module:
- Inspection Results – Define possible outcomes Pass, Fail, In Progress
- Quality Tests – Define what is being measured weight, dimensions, a yes/no question.
- Quality Templates – Group tests into reusable inspection plans.
- Generation Rules – Define when inspections are created Automatically.
Think of it this way:
- Template is your Checklist.
- Tests are the individual items on that Checklist.
- Results are how each item is graded.
- Generation Rules decide when that checklist appears.
Step 1 – Set Up Inspection Results
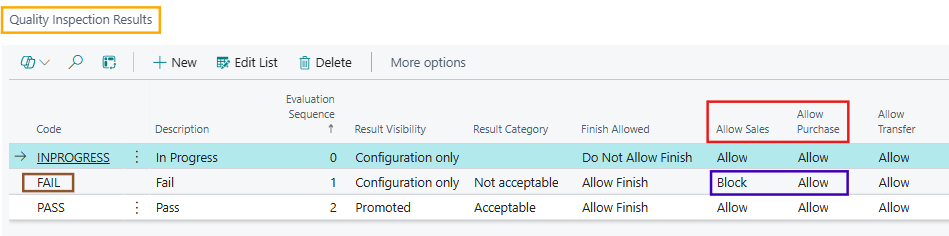
It defines the possible outcomes of a Quality Inspection. Simply Search “Quality Inspection Results”. Default Results Included out of the Box:

You can create custom results to fit your Process. For example, instead of a single “Pass”, you could have Excellent, Good, and Acceptable. Instead of a single “Fail”, you could have Minor Defect, Major Defect, and Critical Failure. Key fields when creating a result:
- Evaluation Sequence – It Controls the order in which results are evaluated. Lower numbers are checked first. Typically Fail conditions are given lower numbers so they take Priority.
- Result Visibility – Controls how a test result is displayed on inspection pages and reports.
- Configuration Only – Used for system configuration only; not prominently displayed.
- Promoted – Displayed prominently on inspection pages and reports (e.g., Certificate of Analysis). Usually used for Pass results.
Note – A Certificate of Analysis (COA) is a document that verifies a product has been tested and meets the required quality specifications before it is shipped or accepted.
- Result Category – Mark as Positive or Negative.
- Acceptable
- Unacceptable
- Blank (Leave blank for inconclusive outcomes)
- Finish Allowed – It decides whether the inspection can be closed based on the selected result.
- Allow Finish – The inspection can be completed.
- Do Not Allow Finish – The inspection cannot be completed. The issue must be resolved first.
- For items using lot, serial, or package tracking, you can also configure which business transactions are blocked when a result is active. For example, block Purchase posting while an inspection is In Progress, or block Sales posting if an inspection result is Fail.
Step 2 – Create Quality Tests
Quality Tests define what is being measured during an inspection. Simply Search “Quality Tests”. For Example, a test called “Net Weight” that checks whether a received item weighs between 9.5 kg and 10.5 kg.
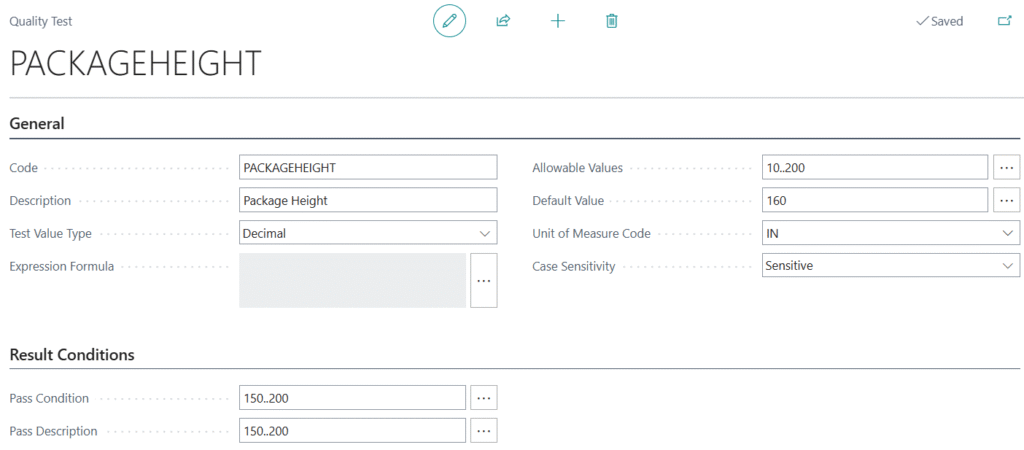
- Code – Specifies the short code to identify the test. Maximum 20 Characters (Both Numbers & Letters)
- Description – Specifies the Friendly Description. Maximum 100 Characters (Both Numbers & Letters)
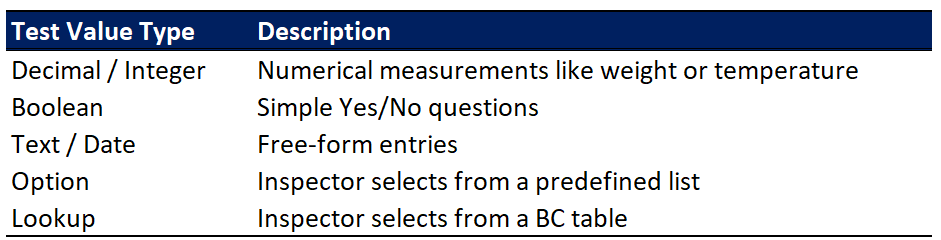
- Test Value Type – Specifies the data type of the values you can enter or select for this test.
- Expression Formula – Specifies a formula for the expression content when using expression field types.
- Allowable Values – Allowable Values define the valid range of values that the inspector can enter.
- Allowable Values: 0..100 → Inspector can enter any value from 0 to 100.
- Default Values – Sets a value automatically when the inspection is created.
- Default Value = Pass → The result is automatically set to Pass unless changed by the inspector.
- Unit of Measure Code – Specifies the unit used to record the measurement for the test.
- Case Sensitivity – Specifies that Uppercase & Lowercase letters are treated as different for text values.
- If enabled, PASS and Pass are treated as different values. If disabled, they are treated as the same.
- Pass Conditions – Defines the condition that must be met for the result to be considered Pass.
- 80..100 → Any value between 80 and 100 is a Pass.
- Pass Description – Description of Pass Condition, also shows during inspections & on the Certificate.
- Percentage must be between 80% and 100% to pass.
Step 3 – Create Quality Inspection Templates
Templates are reusable inspection plans. They group together the tests you want to run & Define the Sample Size.
Navigate to: Search > Quality Inspection Templates
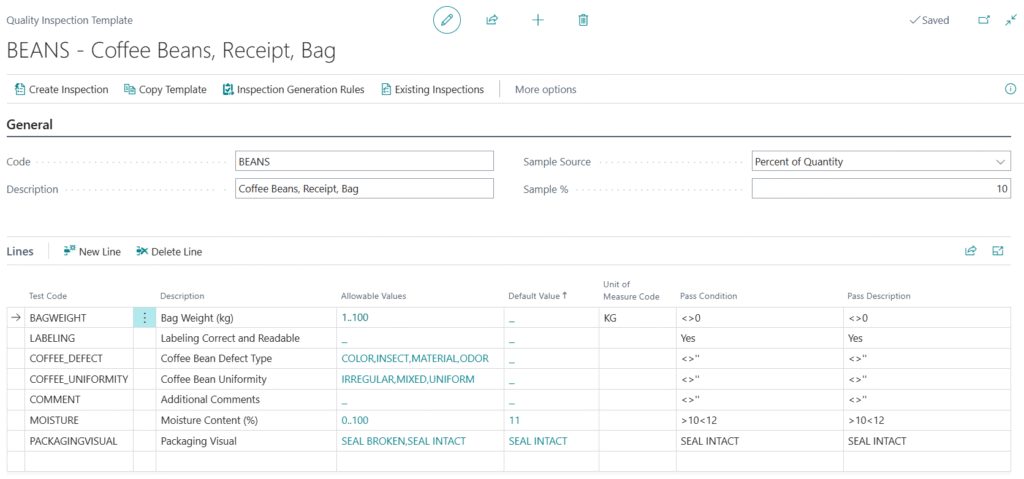
- When creating a template, fill in a Code (e.g., Beans) and a Description. Then add the relevant Quality Tests to the lines section.
- Sample Source – Defines how the inspection sample quantity is calculated.
- Fixed Quantity – Inspect 10 items in every Receipt, regardless of the total quantity received.
- Percentage – Inspect 10% of Received Quantity. e.g., if 500 items are received, inspect 50 items.
- Override Result Conditions – Allows you to replace the test’s default result conditions with different conditions for a specific inspection template.
- The test normally defines Pass = 80–100. For a specific customer, it overrides to Pass = 90–100.
- Copy Template – You can also Copy an Existing Template using the Copy Template action to create a variation without starting from scratch.
Step 4 – Set Up Generation Rules
Generation Rules define when inspections are created automatically and which template to use. For that Search “Quality Inspection Generation Rules”. Each rule connects a Template to a business process. Supported processes include:
- Purchase Receipts
- Production Output
- Assembly Orders
- Sales Returns
- Transfer Orders
- Warehouse Receipts & Movements

Key Fields when creating a Rule:
- Sort Order – If multiple rules could match, the one with the lowest sort order number is used first.
- Template Code – The Inspection Template to use when this rule is Triggered.
- Intent – The type of business Processes this rule applies to:
- Purchase
- Production
- Warehouse Receipt
- Sales Return
- Warehouse Movement
- Transfer
- Assembly
- Unknown
- Table The specific BC table linked to the intent. For example, for purchase receiving, use table 39 (Purchase Line).
- Filters Narrow down when the rule applies using Condition Filter, Item Filter, and Attribute Filter. For example, trigger this rule only for a specific vendor or item category or control it through Attributes.
- Activation Trigger Controls how inspections are created:
- Manual Only – Inspector creates Inspection Manually.
- Automatic Only – System creates Inspection when the Event Fires.
- Manual or Automatic – Both Methods Enabled.
- Disabled – No Inspections Created.
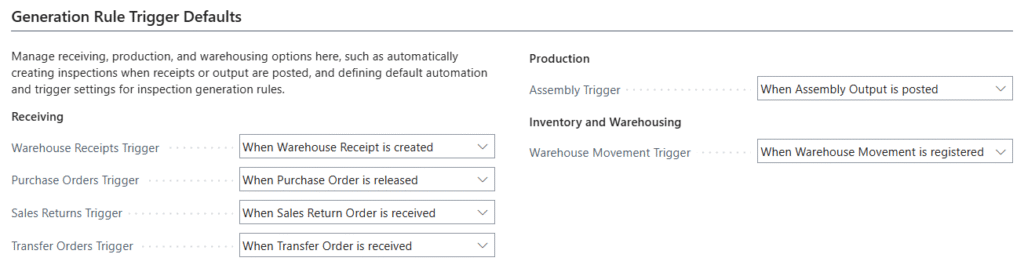
- Trigger – Specifies whether the generation rule should be used to Automatically create Inspections based on:
- Purchase Order Trigger
- Never
- When Purchase Order is Received
- When Purchase Order is Released
- Production Order Trigger
- Never
- When Production Output is Posted
- When Production Order is Released
- When a Released Production Order is Refreshed
- Purchase Order Trigger
- Schedule Group – A folder that holds Multiple Inspection Rules, so one schedule can run all of them together. It creates a Job Queue in the System with an Object ID 20412.
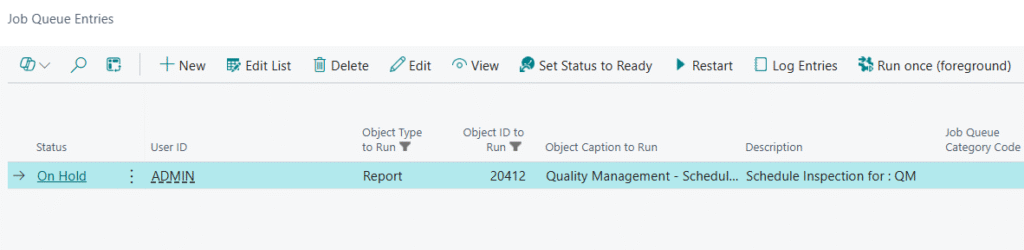
Business Central also provides assisted setup wizards for the three most common scenarios receiving goods, moving inventory between bins, and inspecting production output which simplify rule creation through a guided form.
Quality Management Setup
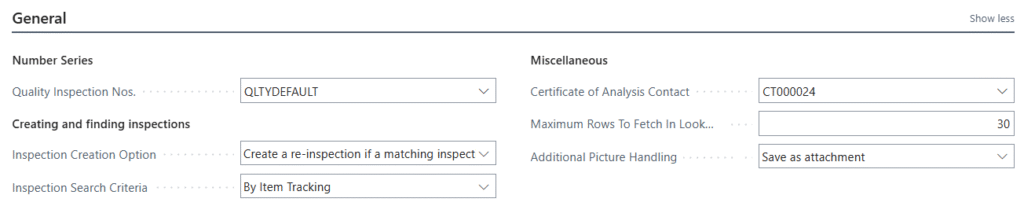
General
- Quality Inspection Nos. – Specifies the default number series for quality inspection documents.
- Inspection Creation Option – Specifies whether and how a New Quality inspection is created if existing inspections are found.
- Always Create a New Inspection
- Create a Re-Inspection if a Matching Inspection is Finished
- Always Create a Re-Inspection
- Use Existing Open Inspection if Available
- Use Any Existing Inspection if Available

- Inspection Search Criteria – When a new transaction (Purchase/Sale) arrives, system first searches for an existing inspection.
- By Standard Source Fields – Searches using Document Type and Document Number
- Find inspection linked to Purchase Order #1001
- By Source Record – Searches from the specific record where inspection was created.
- Check the same record for Supplier “ABC”
- By Item Tracking – Searches using Serial Number or Lot Number
- Find inspection for Lot #L001
- By Document and Item Only – Only matches Document + Item — ignores everything else
- PO #1001 + Item #ITEM001, nothing else needed
- By Standard Source Fields – Searches using Document Type and Document Number
- Certificate of Analysis Contact – Specifies the contact details that will appear on the Certificate of Analysis report when supplied. (This is typically your internal QC Contact or Company Contact, not the customer). Normally, it will be going to be an Employee’s Contact.
- Maximum Rows To Fetch In Lookups – Specifies the maximum number of rows to fetch on data lookups. Keeping the number as low as possible will increase usability and performance. A larger number will reduce performance and reduce usability.
- Additional Picture Handling – Specifies what to do with a picture after it has been taken.
- None
- Save as Attachment
- Save as Attachment and upload to OneDrive
Generation Rule Trigger Default
- Triggers – Sets the Default Trigger Point for each type of document.
Bin Movements and Reclassifications
- Set up the batch that will be used when moving inventory to a different bin or when changing item tracking information. The batch applies to manual Move to Bin actions, Power Automate flows, and reclassification journals.

Inventory Adjustments
- The batch to use when reducing inventory quantity, such as when disposing of samples after destructive testing or writing off stock due to damage or spoilage.

Item Tracking
- Item Tracking Before Finishing – Specifies when item tracking is required for inspections, including whether missing values are allowed, only posted tracking is accepted, reserved (unposted) tracking is permitted, or any non-empty lot/serial/package value is valid.
- Allow without Item Tracking
- Allow Only Posted Item Tracking
- Allow Reserved and Posted Item Tracking
- Allow any Non-Empty Value
- Quality Inspection Selection Criteria – Specifies the checks the system uses to decide if a document-specific transaction should be blocked.
- Any Inspection that Matches
- Only the most Recently Modified Inspection
- Only the Newest Inspection/Re-Inspection
- Any Finished Inspection that Matches
- Only the Most Recently Modified finished inspection
- Only the Newest Finished Inspection/Re-Inspection

Process With Inspection
At this point, the setup is complete, and we are ready to start using the module. Just Remember that we have enabled Purchases, but Sales are Restricted if Inspection Fails. Just to show that both scenarios are Possible.
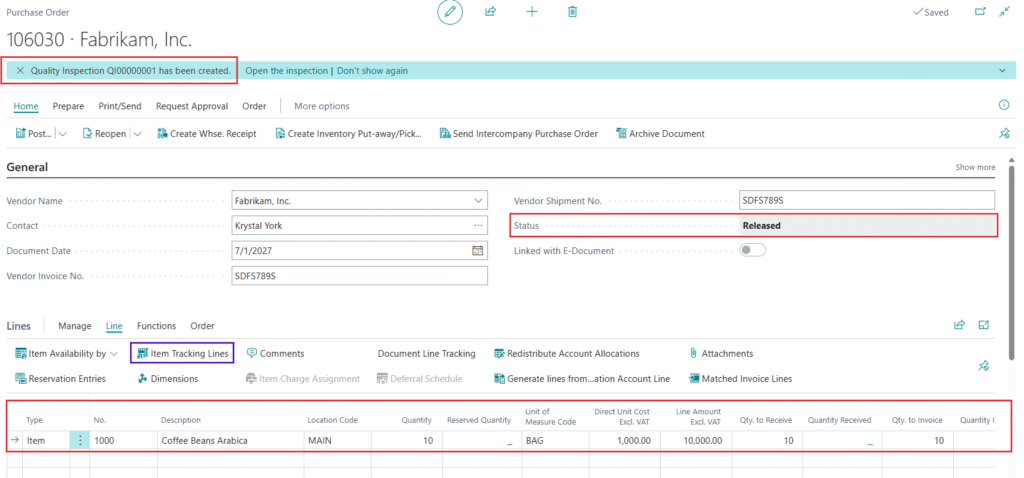
Purchase Order
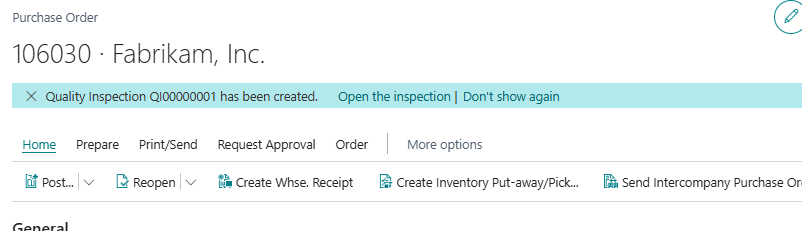
- Simply create a Purchase Order and select the item which falls under the filter of Inspection Template selection. I specified the Item Tracking Lot Code and release the document. I received a Notification that “Quality Inspection has been Created”.
- Click on the “Open the Inspection”, coming in the Notification.
- What if I Reopen the document and Release it Again, then
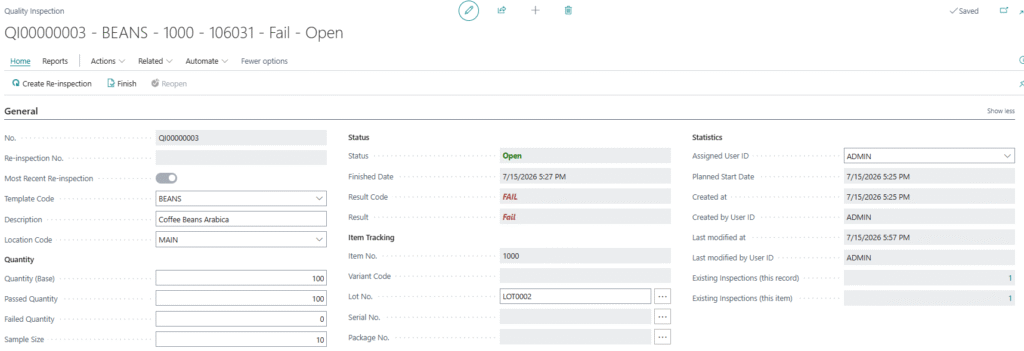
Quality Inspection
- Many fields are Auto Filled.
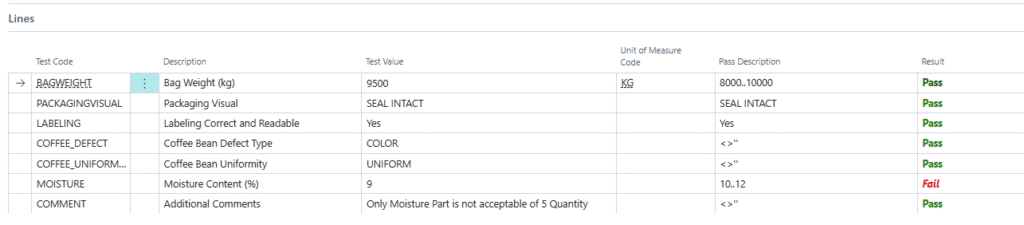
- The Result is Fail because in Line level we did not meet the Criteria for Moisture Content Percentage.
- Once Line Level is Specified then we will Finish this Inspection.
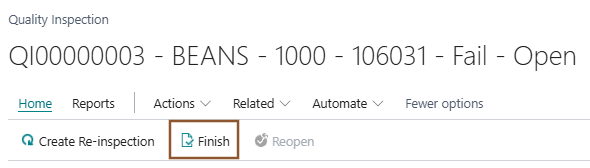
- Once it is done, we have few options which we need to adopt which we discuss in Quality Management Setup > “Inspection Creation Option”.
Sales Order
Now the Inspection Report say’s that Quality Report is failed now. Now let’s try to sell it.
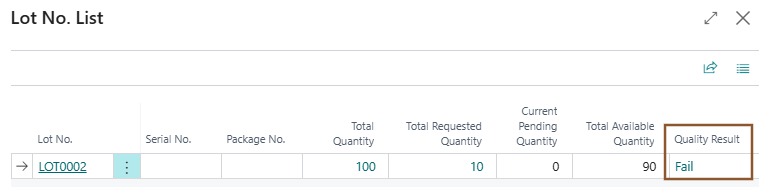
- Quality Result = Fail
- Now let’s sell this.
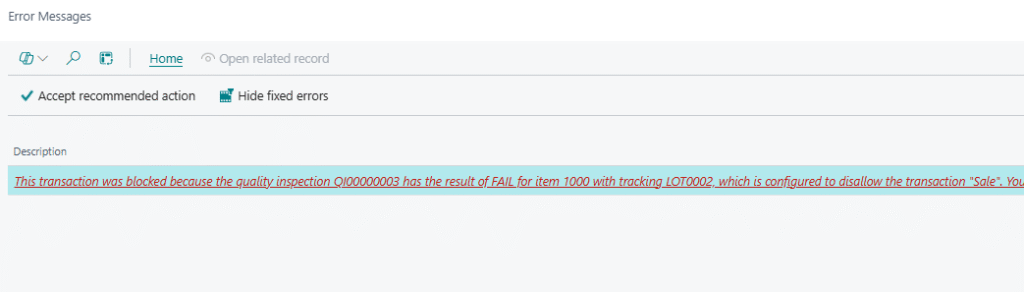
Re-Inspection
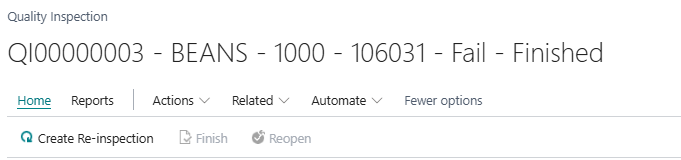
- Now because our first Inspection Fails so we will call re-inspection by simply clicking on the Button on Quality Inspection Page.
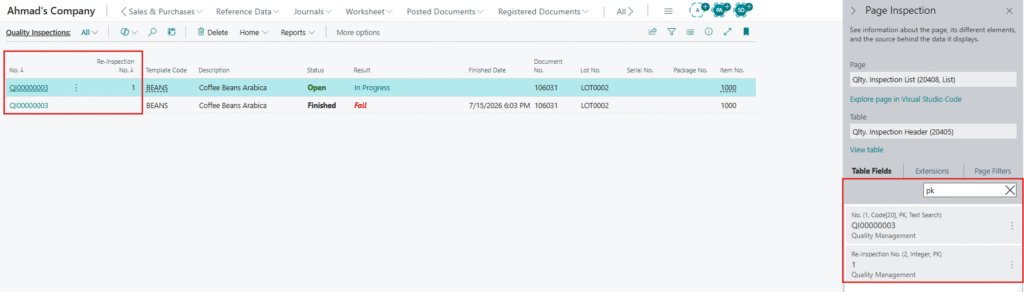
- It will create another Quality Inspection with same number, but Re-Inspection No. will track the new one.
- Now we will meet the Criteria.
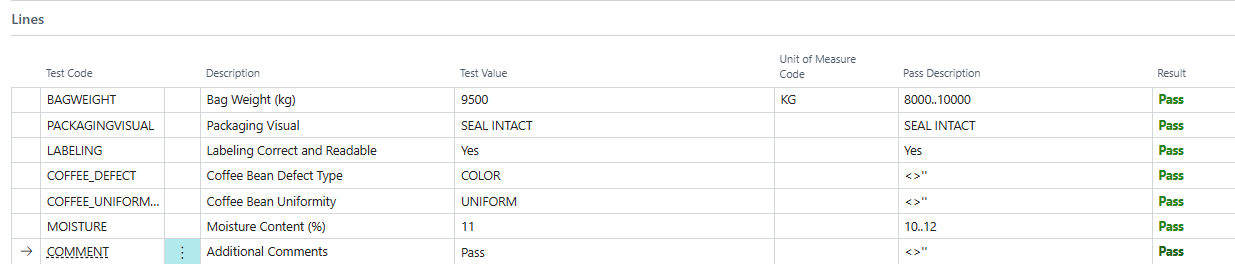
- Now Finish the Inspection.
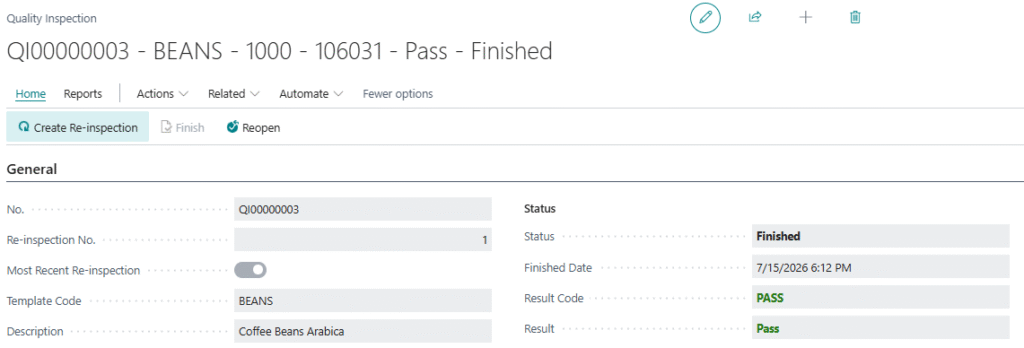
Posting Sales Order
- Now I will go back to Sales Order and if we check the Quality Status then it will show you Pass.
(I did not delete the line and select the Lot number again)
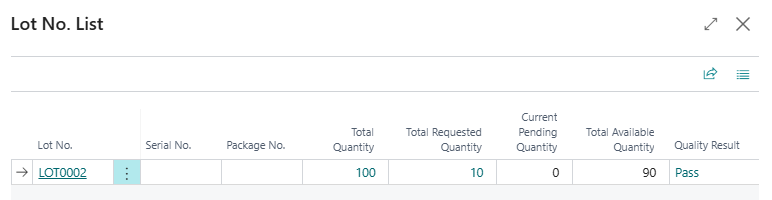
- Now let’s Post the Sales Order.