
Understanding the Process – Through Departmental Roles
To truly understand the Sales to Receive (S2R) process, it’s essential to know how each department contributes at every stage. The S2R process is not just about selling — it’s a collaborative workflow connecting Sales, Warehouse, and Finance teams from the Initial Customer Inquiry to the Final Cash Receipt.
1. Sales Department — The Starting Point
The journey begins with the Sales Department, responsible for managing customer relationships, quotations, and order confirmations. where the sales team records the customer’s requested items, quantities, and negotiated prices.
2.Warehouse / Dispatch Department — Shipment and Delivery
After the Sales Order is confirmed, the process moves to the Warehouse or Dispatch Department.
Their responsibility is to pick, pack, and ship the ordered goods to the customer. This step records that the goods have been physically delivered and automatically updates the company’s inventory and item ledgers.
3. Finance Department — Invoicing and Receipts
Once goods are shipped, the Finance (Accounts Receivable) team takes over. They will manage the Sales invoice and then finalize the sale and record the customer’s outstanding balance. When the customer makes payment, the Finance team records the relevant entry. Payments can be received via bank transfer, cheque, cash, or online payment methods, depending on company policy.
4. The Connection — Why Each Role Matters
Every department plays a crucial role in the Sales to Receive (S2R) process, and their actions are tightly interlinked. A delay or inaccuracy at any stage such as an unposted shipment, incorrect invoice, or unrecorded payment can disrupt the entire workflow and impact on customer satisfaction or financial accuracy. Business Central strengthens process control by connecting every document and maintaining a complete audit trail throughout the sales cycle:
- Sales Department — initiates the process by managing customer inquiries, creating quotes, and confirming orders.
- Warehouse / Dispatch Department — ensures timely and accurate delivery of goods while keeping inventory records updated.
- Finance Department — completes the cycle by invoicing customers, tracking receivables, and recording payments.
How to Create a Customer in Business Central
In Business Central, customers are an important part of the sales process as they represent the people or companies purchasing your products or services. This guide explains how to create a new customer record at Business Central, helping you manage sales, invoices, and payments smoothly and efficiently.
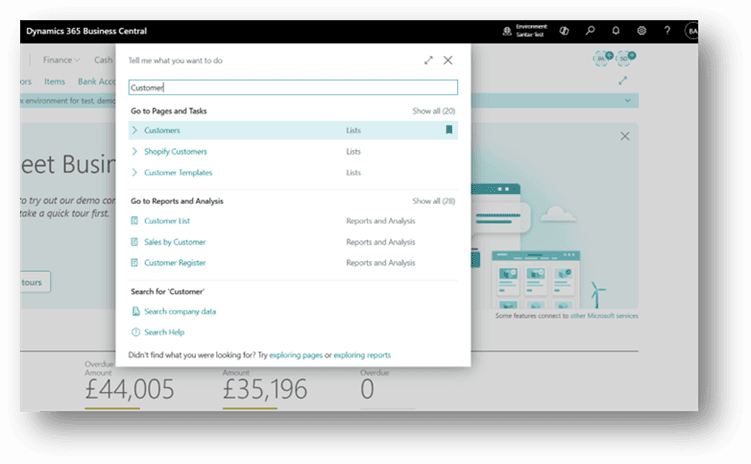
Step 1: Open the Customers List
In the search button, we’ll type “Customers” and then choose the Customers link in the search results.
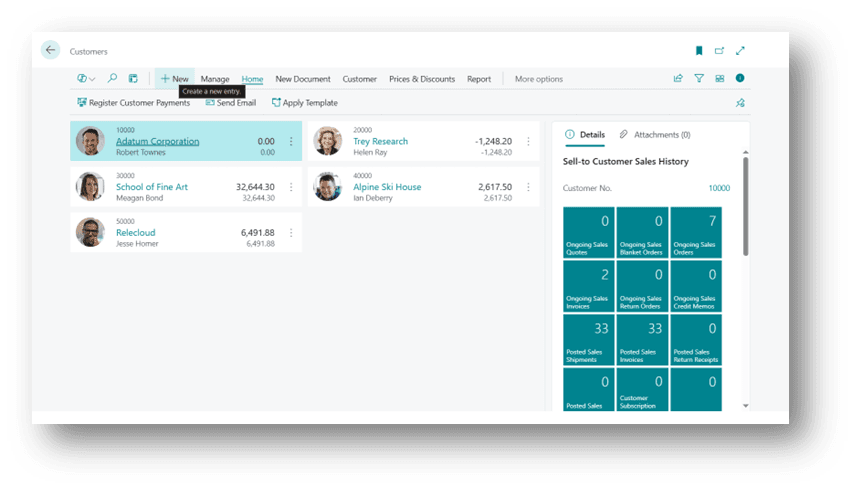
Step 2: Create a New Customer
- In the Customer list, click New to create a new Customer record.
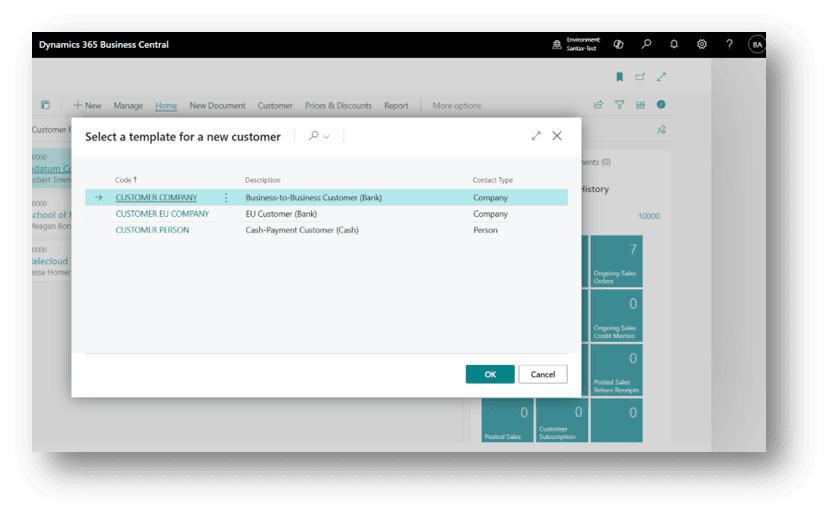
- Then you can choose the customer card template. For example, “Customer EU Company“.

- After choosing the customer card template we are redirected to the customer card.
Step 3: Fill in Customer details
The user needs to fill out the Customer Card with all the essential details. On the Customer Card, you’ll find several important sections, such as:
- General Information: customer number, company name, and other identification details.
- Financial Information: budget limits, pricing, or cost-related settings.
- Address and Contact Details: business address, email, and phone number.
- Invoicing Details: general ledger setup, currency selection, and any discount configurations.
- Payment Information: preferred payment methods, default due dates, and reminder schedules.
- Delivery Information: shipping address and delivery preferences.
Once all the necessary information is entered, simply save the record — and you’re ready to start selling products and services to the new customer.
Sales to Receive Process Flow in Business Central
Now we will process the complete Sale cycle.
How to Create a Sale Quote
A Sales Quote can be used as a preliminary draft for a sales order, which can later be converted into a Sales Invoice.
It allows you to record customer inquiries, propose pricing, and manage potential sales before confirming the order.
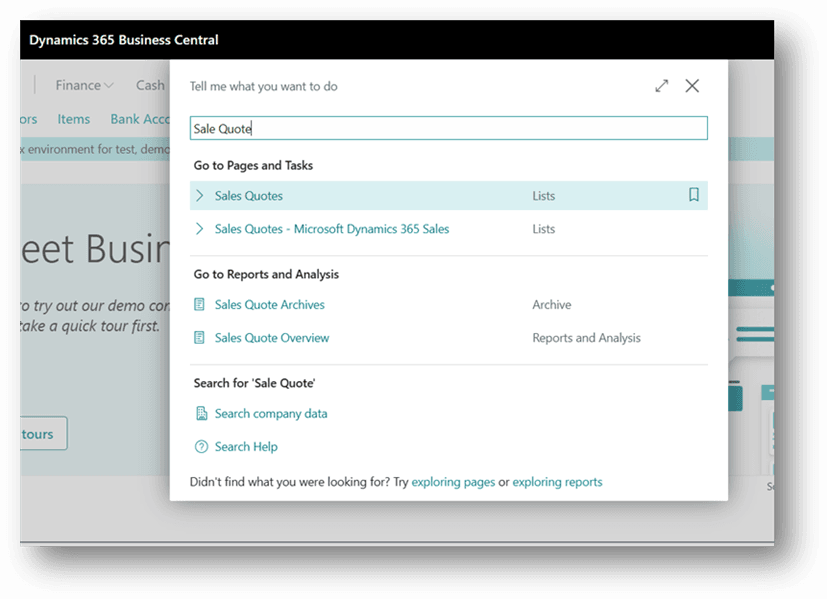
- Click the Search button or press Alt + Q on the application bar, type Sales Quotes, and then choose the related link.
- On the Sales Quotes page, click New to create a new sales quote.
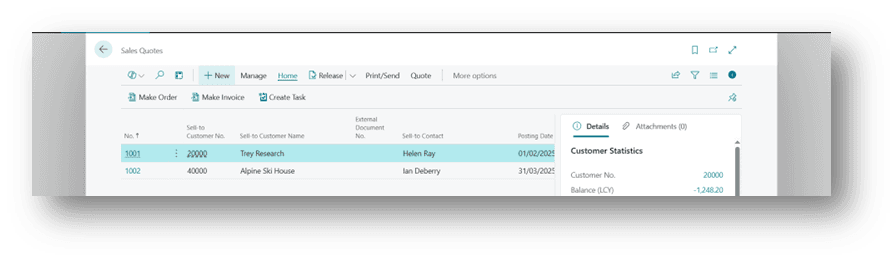
- The Quote Number will be automatically generated based on your number series setup.
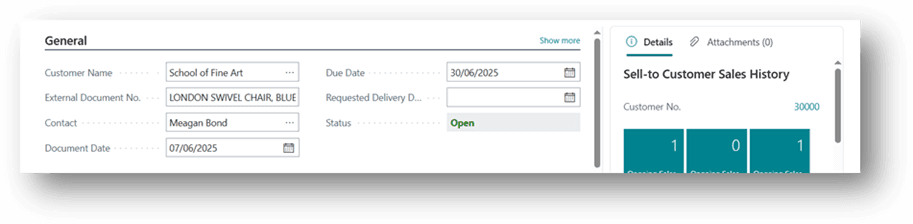
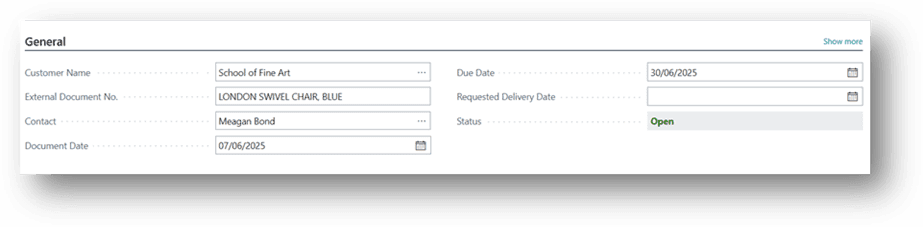
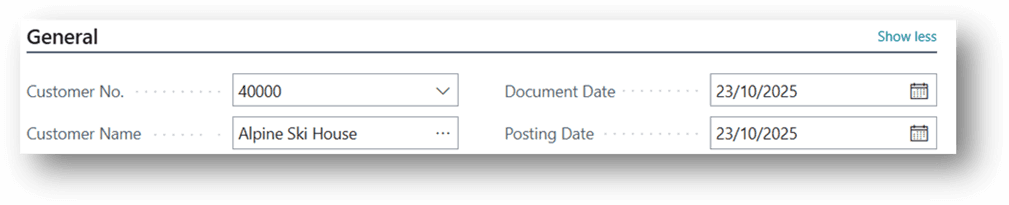
- In the Customer Name (or Sell-to Customer) field, select the customer for whom the quotation is being created.
- In the Document Date field, enter the date when the quotation is prepared or shared with the customer.
- Most of the remaining information (like currency, payment terms, salesperson, and address) will automatically populate from the Customer Master Data.
Please review and modify any details as needed.
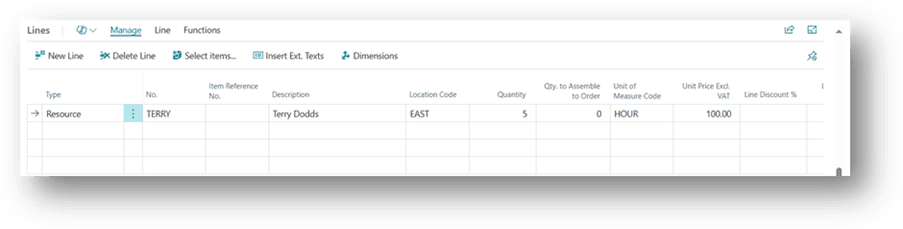
- In the Lines section, select the Line Type as Item, G/L Account, Resource, or Charge (Item) depending on what you are quoting.
- In the No. field, choose or enter the product, service, or account number.
- Enter the Location from which the goods will be shipped after order confirmation.
- Enter the Quantity and Unit of Measure (UOM) for each line.
- Enter or verify the Unit Price for each item or service.
- If approval workflow is enabled, go to Request Approval.
- Click on Send Approval Request to route the quote for approval.
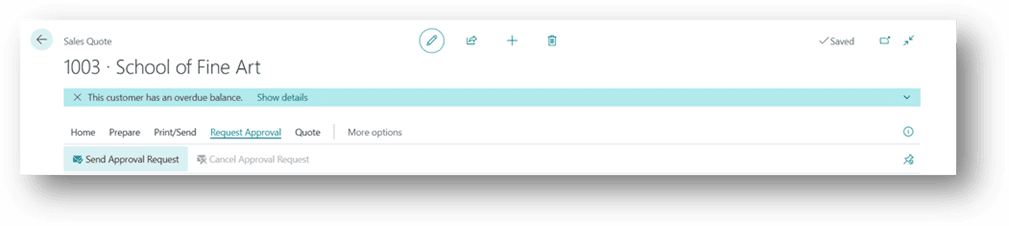
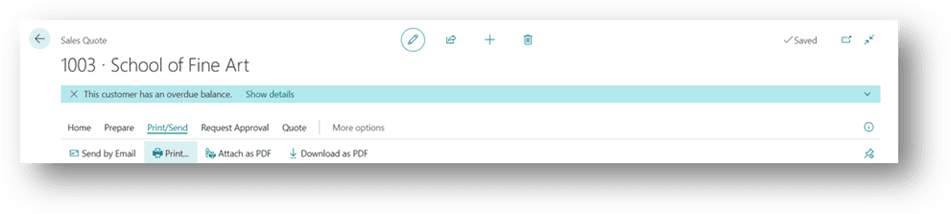
- After the approval process from the approver (if applicable), ensure that the Sales Quote is in the Released state.
- On the Header, click Print/Send, then choose whether to print the quote or send it directly to the customer via email.
- Once the customer confirms the quote, it can be converted into a Sales Order.
- When you click on Make Order, the system will ask for confirmation before conversion, click Yes to proceed.

- A Sales Order will be created automatically, carrying forward all the customer and item details along with the Quote Number for reference and tracking. From this point, follow the same process as described in the Sales Order and Sales Invoice steps.
How to Create a Sale Order
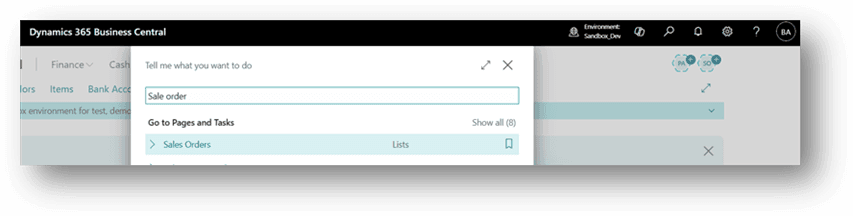
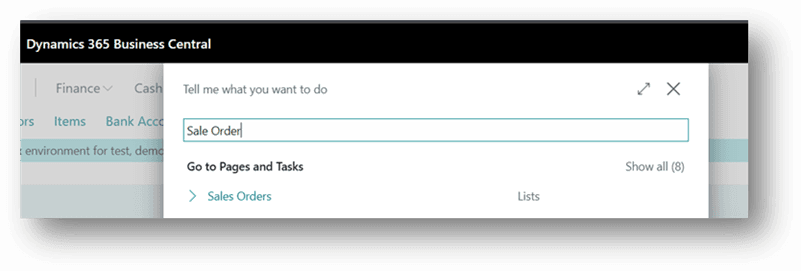
- Click the Search button or press Alt + Q on the application bar, type Sales Orders and then choose the related link.
- On the Sales Orders page, click New to create a new order.

- The Order Number will be automatically generated based on your number series setup.
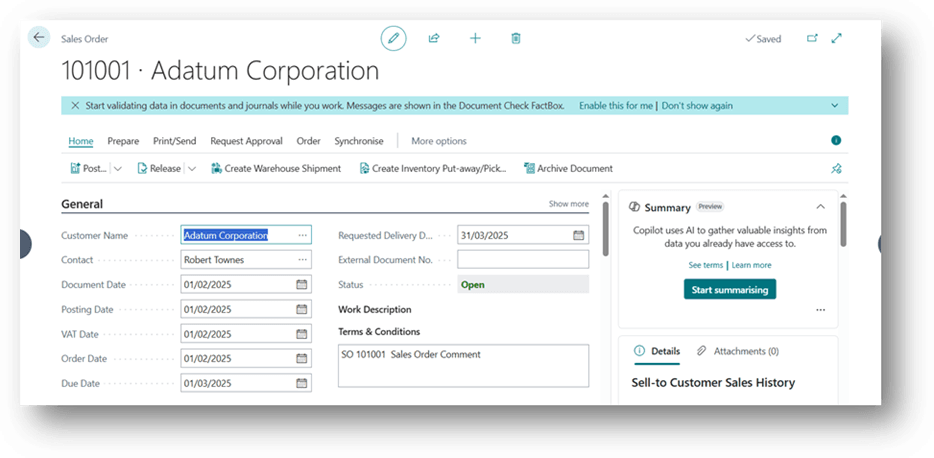
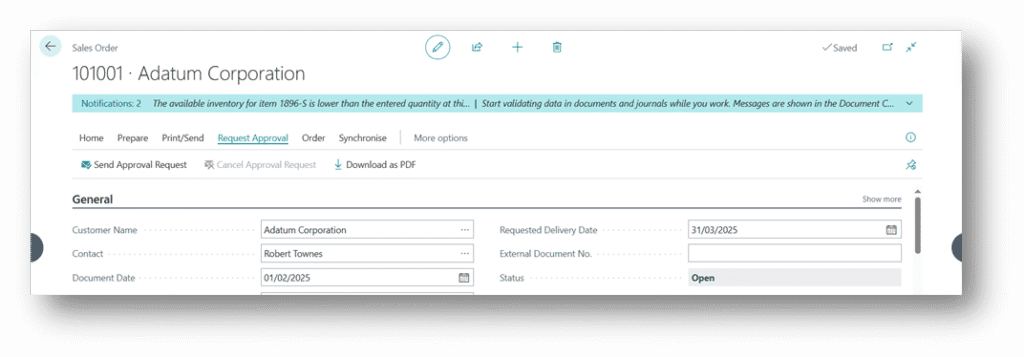
- In the Customer Name (or Sell-to Customer) field, enter or select the customer placing the order.
- In the Document Date field, enter the order date.
- Most of the remaining information (such as currency, payment terms, address, and salesperson code) will be automatically published from the Customer Master Data. Please review these details and make any changes as needed.
- In the Lines section, select the Type as Item, G/L Account, Resource, or Charge (Item) depending on what you are selling.
- In the No. field, choose the product, service, or account that you want to include in the order.
- Enter the Location from where the goods will be shipped.
- Enter the Quantity and Unit of Measure (UOM).
- Verify or enter the Unit Price for each line.
- The price and discount may automatically appear from the customer or item setup.
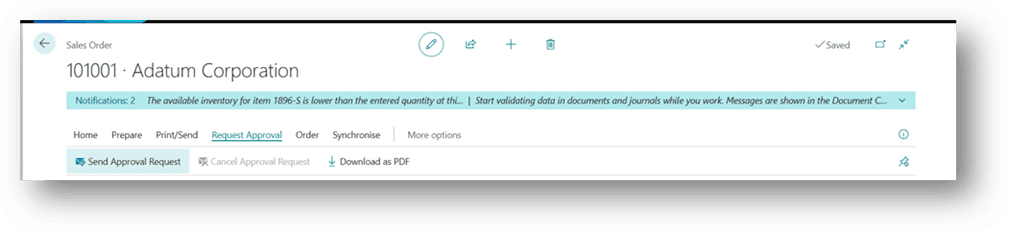
- If approval workflow is enabled, go to Request Approval.
- Click on Send Approval Request.
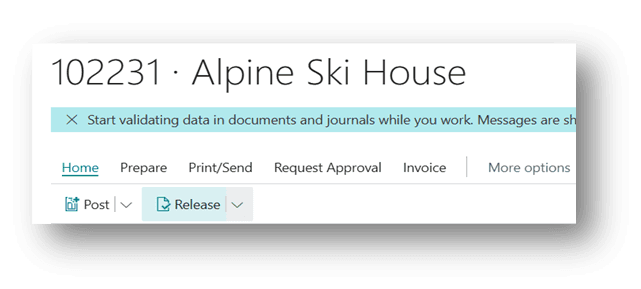
- Once the approval process is complete (if applicable), make sure the Sales Order status is set to Released. This means the order is ready for shipment or invoicing.
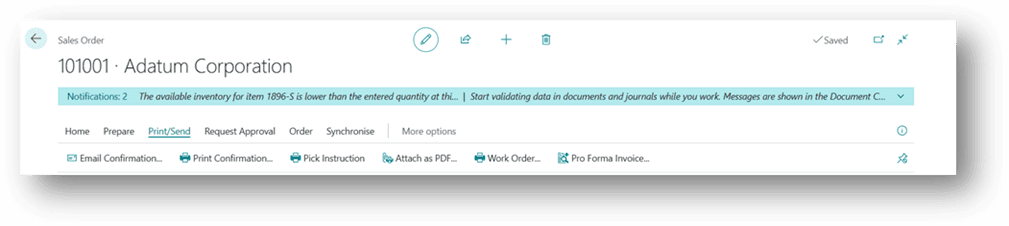
- On the Header, click Print/Send, and choose the required option to print the Sales Order or send it directly to the customer via email.
How to Create Warehouse Shipment
The Warehouse Department creates the Warehouse Shipment for them to pick, pack, and ship the items according to the customer’s sales order schedule.
This process ensures accurate inventory tracking and timely delivery of goods to customers.
- Click the Search button or press Alt + Q on the application bar, type Sales Orders and then choose the related link.
- On the Sales Orders page, select the relevant Sales Order from the list and click Create Warehouse Shipment.
(Alternatively, open the Sales Order document and choose Create Warehouse Shipment from the header.)

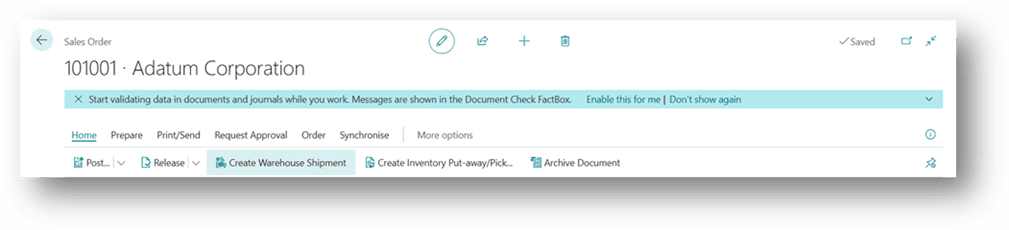
- Based on user permissions, clicking Create Warehouse Shipment will open a new window showing the newly created shipment document.
- This Warehouse Shipment will also be visible to the Warehouse Department, allowing the warehouse team to proceed with picking and shipping activities (as explained in a separate warehouse process document).
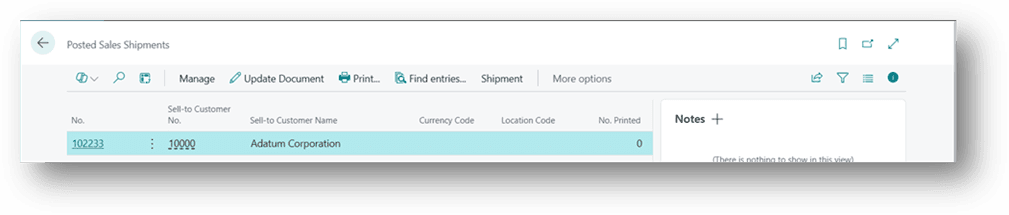
- Once the warehouse shipment is posted by the warehouse team, the Quantity Shipped field in the Sales Order will automatically update to reflect the dispatched quantity.
- To view the posted shipments, click Order, then select Shipments.

- When you open Shipments, the system will display a list of all related shipment records.
Click on any Shipment Number to review its full details, if required.
How to Create Sale Invoices
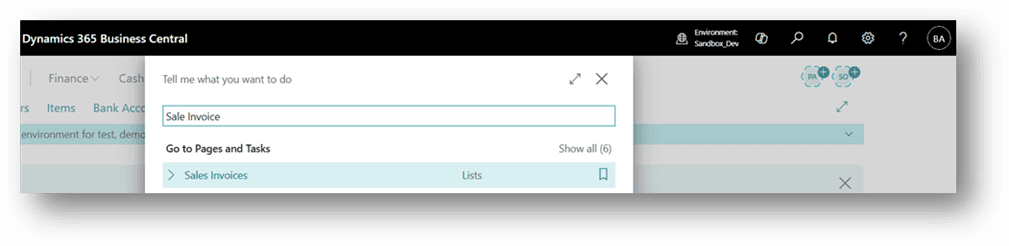
- Click the Search button or press Alt + Q on the application bar, type Sales Invoices, and then choose the related link.
- Click New to create a new Sales Invoice.
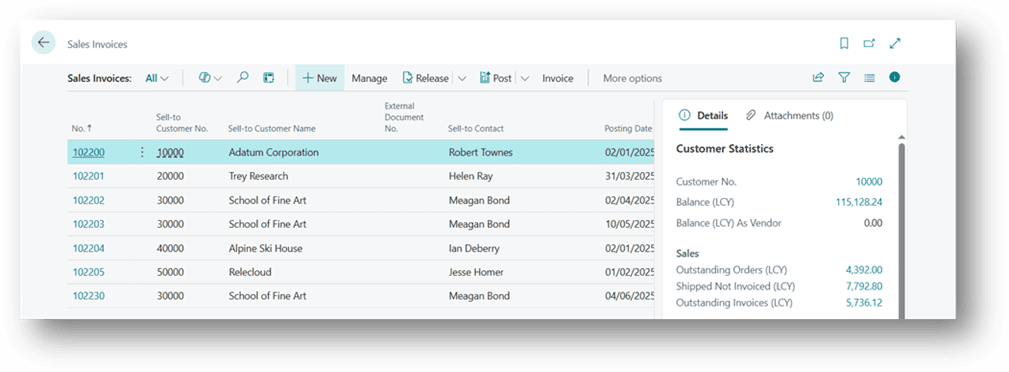
- On the Header, enter the Customer Name and Customer Invoice Number (if applicable) for which the invoice is being prepared.
- Click on Line, then choose Get Shipment Lines under the Functions action to bring in the relevant Warehouse Shipment details into the invoice lines.
- In the Get Shipment Lines window, select the shipment lines that belong to the customer you selected in the General Section.
- After selecting the relevant shipment lines, the items will automatically appear in the Invoice Lines section.
- Review all the information, such as quantity, price, discount, and tax details.
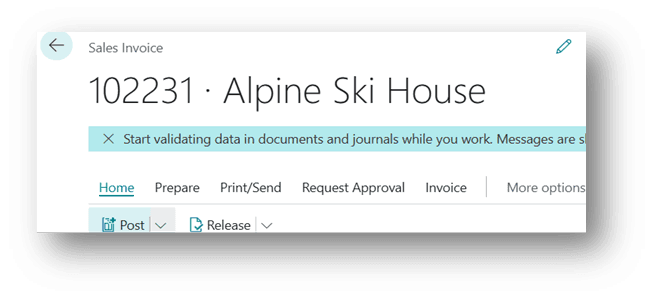
- Change the status of the invoice to Released and then Post the invoice to finalize it.
Open Posted Sale Invoices
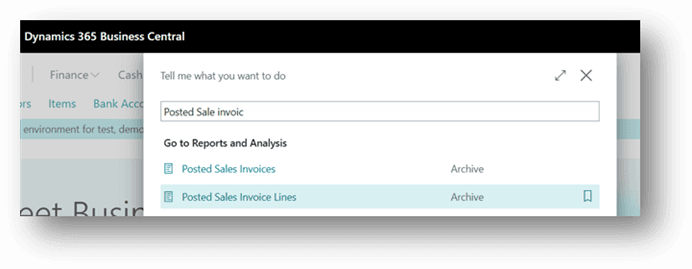
- To view posted invoices, click the Search button or press Alt + Q, type Posted Sales Invoices, and choose the related link.
- The list of all posted Sales Invoices will appear on the page.
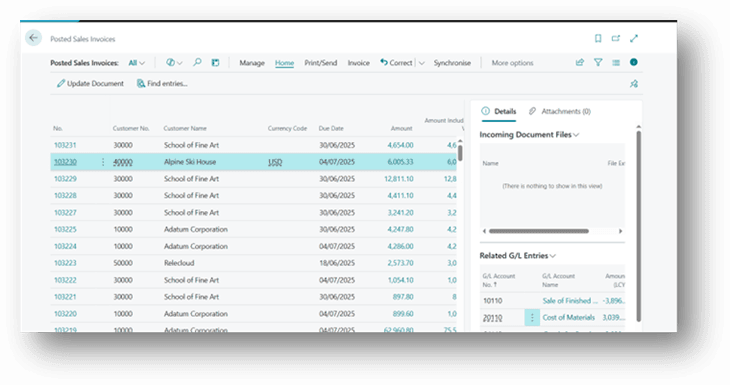
- Select the required invoice document from the list.
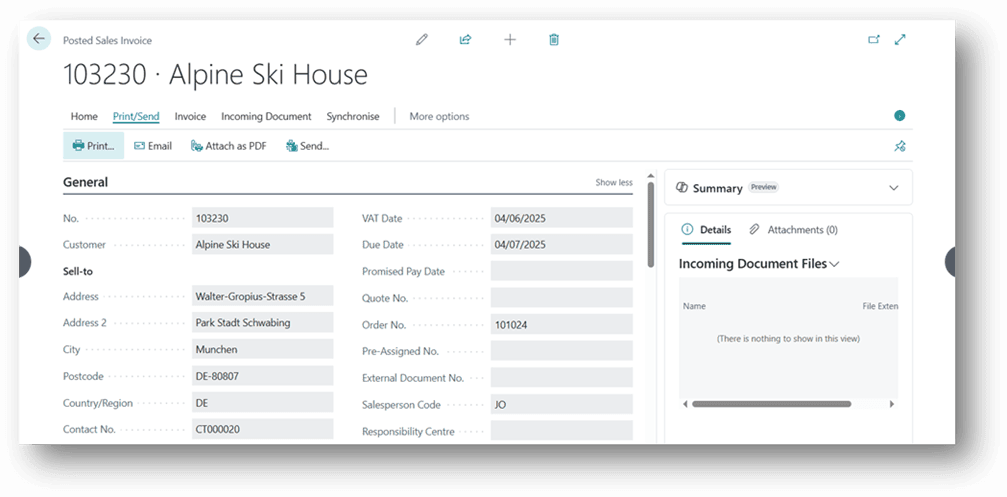
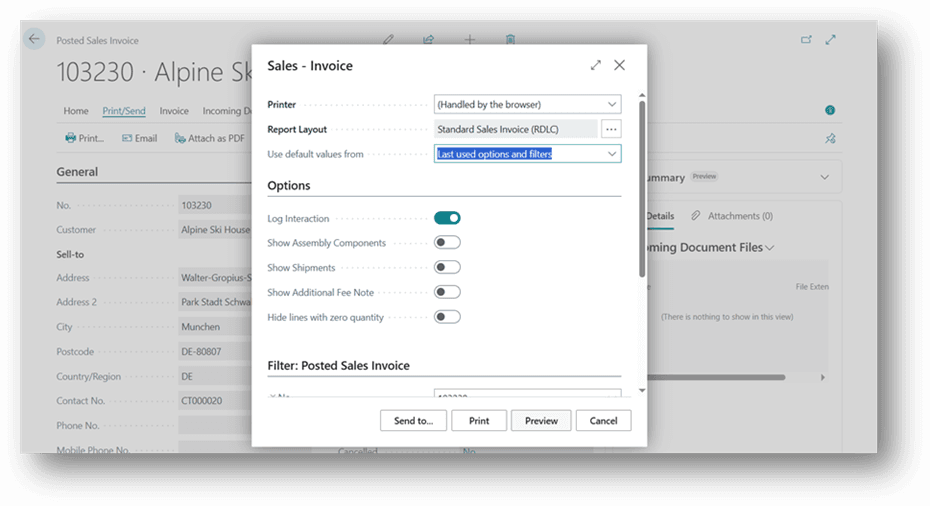
- Click Print to print the invoice document or choose Preview to view it on screen.
Cash Receipt Journal:
A cash receipt journal is a type of general journal in Business Central. You can use it to post payments to accounts like general ledger, bank, customers, vendors, and fixed assets. You can also apply the payment to customer entries at the time of posting or even later.
-
Open Cash Receipt Journals
Click Search (Alt+Q) in the top-right corner, type Cash Receipt Journals, and open it.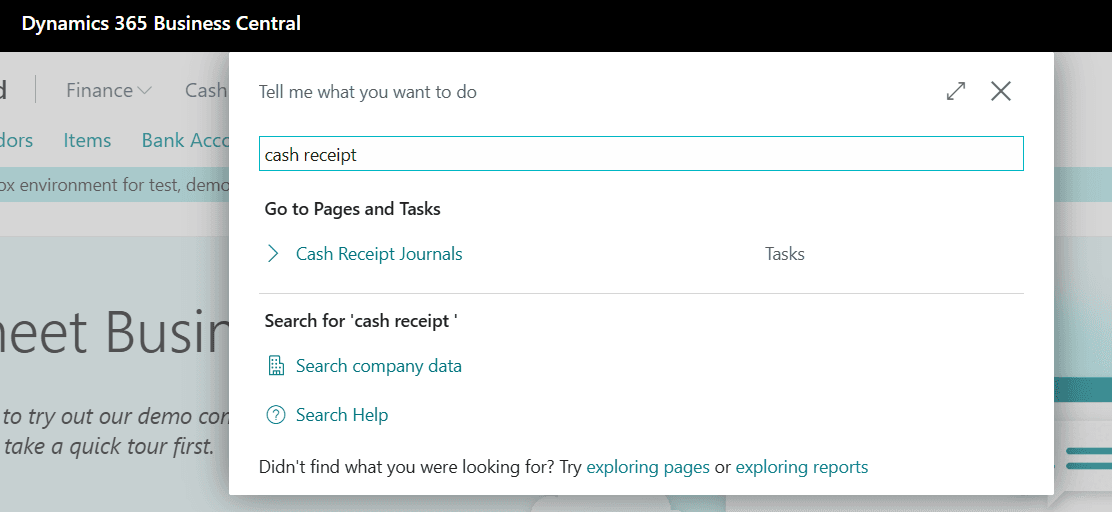
-
Edit the Journal
Choose Edit Journal. -
Choose a Batch
Select the correct batch in the Batch Name field.
-
Enter Posting Date
Fill in the Posting Date. -
Select Document Type
In Document Type, choose Payment. -
Document Number
The Document No. is automatically filled from the number series set for the batch. -
External Document No.
Use this field to enter an external reference, like a customer’s check number.
Note: This field might be hidden. If you want to use it, you can show it through Personalization. -
Choose Customer Account
In Account Type, select Customer, then choose the customer in the Account No. field. -
Select Balancing Account
To post the payment correctly:-
Set Bal. Account Type to G/L Account for cash, or Bank Account for bank payments.
-
Set Bal. Account No. to the right cash or bank account.

-
-
Post the Journal
Once everything is filled in, post the journal.
Hope so, you have learned from this article.
Best Regards,
Ahmad Subhani
D365 Business Central Functional Consultant
Email ahmadsubhani424@gmail.com
WhatsApp +923357687164